How to Jump Start a Car: The Complete Step-by-Step Guide
Dead battery? Don’t panic. Follow these 7 simple, safe steps to get your car running again in under 10 minutes — no mechanic required.
📋 Table of Contents
- What You’ll Need
- Safety First: Before You Begin
- Step-by-Step: How to Jump Start a Car
- Jumper Cables vs. Portable Jump Starter
- Common Mistakes to Avoid
- Top-Rated Jump Starters & Cables on Amazon
- FAQ
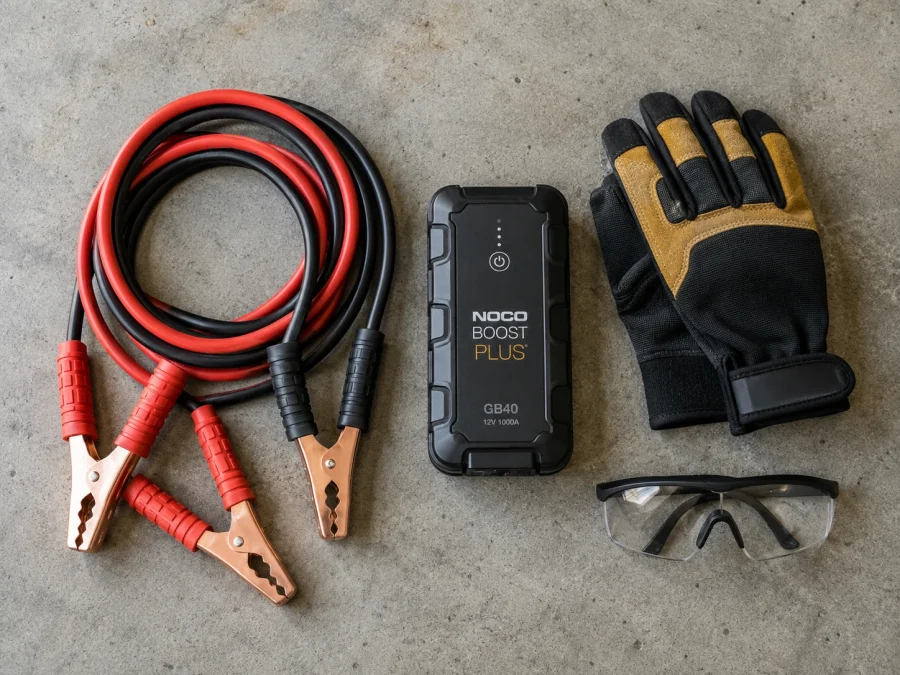
🧰 What You’ll Need
Before you start, gather these essentials. Keeping them in your trunk year-round means you’ll never be stranded without the right tools.
- Jumper cables — ideally 10–12 ft or longer, 4–6 gauge
- Portable jump starter — useful when you do not have a second vehicle nearby
- A working vehicle with a charged battery, if using jumper cables
- Safety gloves and glasses — optional but recommended
- Your owner’s manual — battery location varies by vehicle model
⚠️ Safety First: Before You Begin
Important: Jump starting a car involves electricity and batteries can emit flammable hydrogen gas. A few precautions can help protect you, the vehicles, and the battery system.
- Turn off the ignition and all electronics in both vehicles.
- Never let the red and black clamps touch each other.
- Check for cracks, leaks, swelling, or heavy corrosion before connecting anything.
- Keep cables away from moving engine parts like fans and belts.
- Do not smoke or use open flames near the battery.
Stop and call a professional if: the battery is visibly leaking, swollen, cracked, frozen, or smells like rotten eggs. These can be signs of a damaged battery that may be unsafe to jump start.
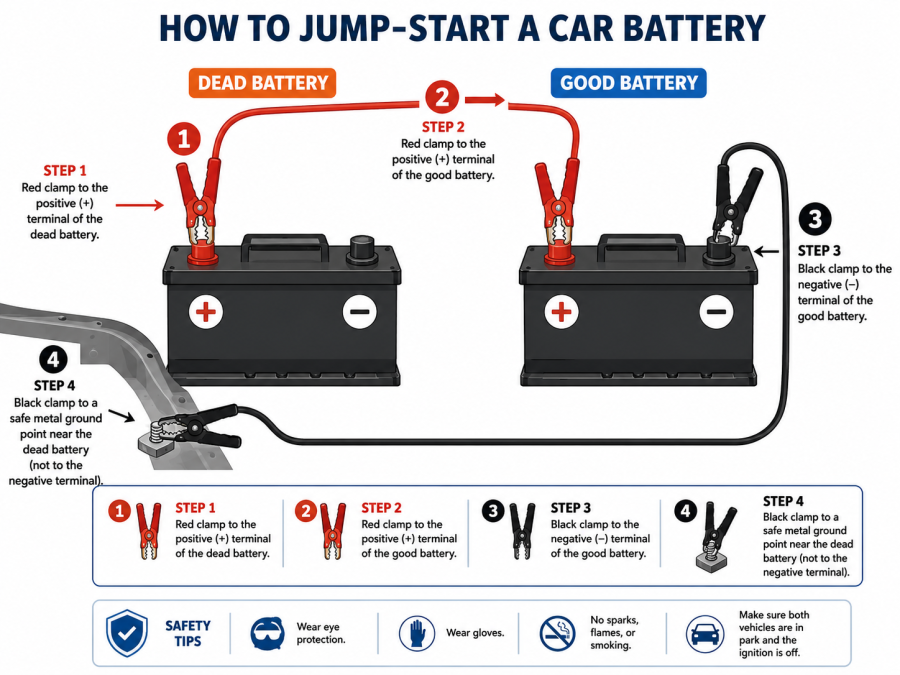
🔋 Step-by-Step: How to Jump Start a Car
Follow these steps in order. The sequence matters for safety and helps reduce the chance of sparks near the dead battery.
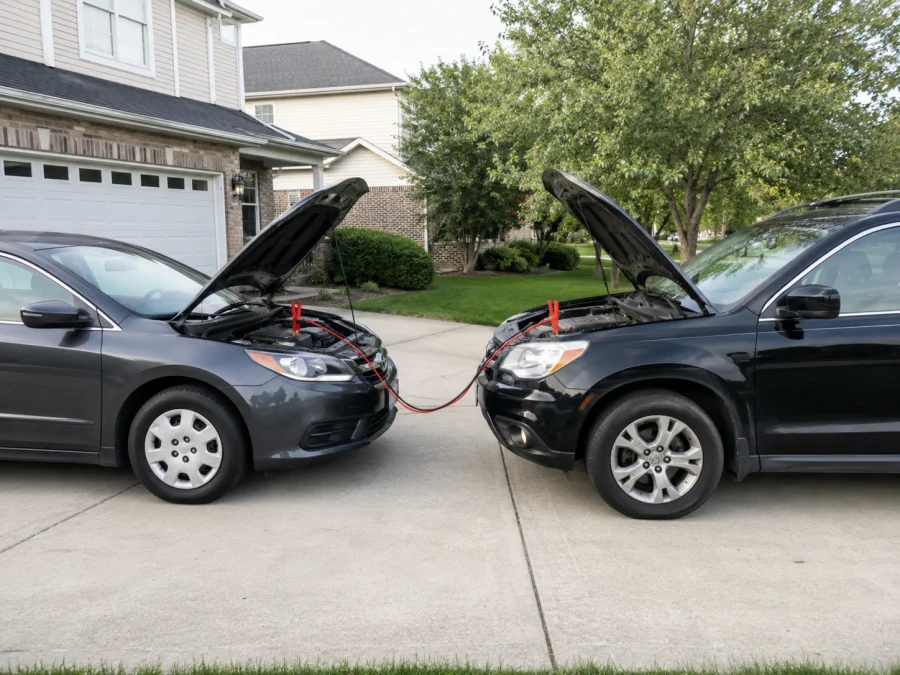
1. Position the Vehicles
Park the working car close to the dead one — hood to hood or side by side — close enough that the cables reach both batteries comfortably. Make sure the cars are not touching.
2. Turn Off Both Engines
Switch off the ignition in both vehicles and engage the parking brakes. Open both hoods and locate each battery.
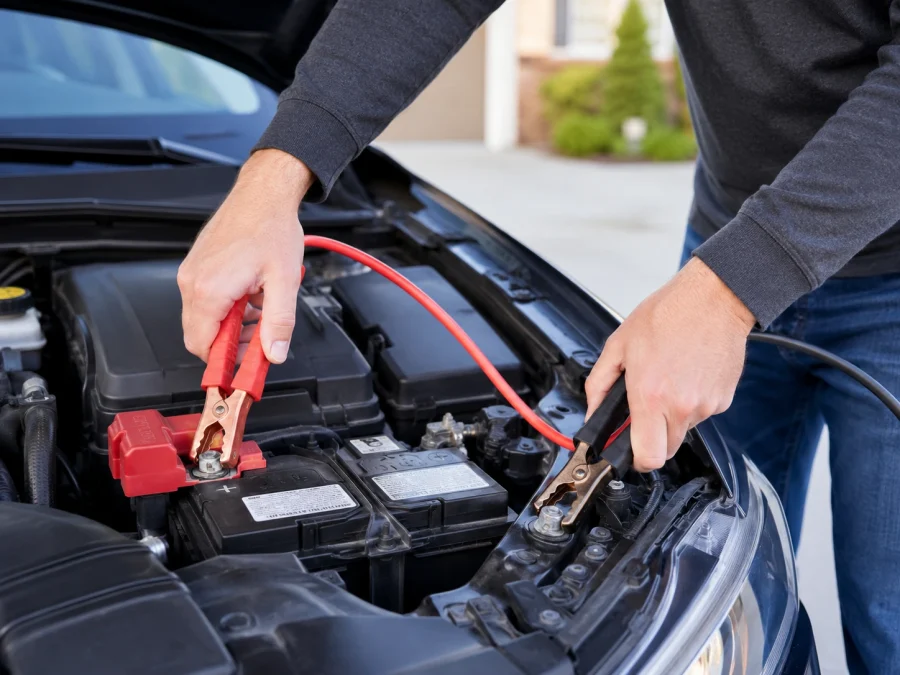
3. Connect Red to the Dead Battery
Attach the red positive clamp to the positive terminal on the dead battery. Look for a plus sign (+) or a red terminal cover.
4. Connect Red to the Good Battery
Attach the other red positive clamp to the positive terminal on the working battery.
5. Connect Black to the Good Battery
Attach one black negative clamp to the negative terminal on the working battery.
6. Ground the Final Black Clamp
Attach the last black clamp to an unpainted metal surface on the dead car’s engine block — not directly to the dead battery’s negative terminal. This helps reduce spark risk near the battery.
7. Start the Engines
Start the working vehicle and let it run for 2–3 minutes. Then try starting the dead vehicle. If it starts, let both cars run for a few minutes before disconnecting the cables in reverse order: black ground first, then the other black clamp, then both red clamps.
Didn’t start? Wait a few minutes and try again. If it still will not start, the battery may be too weak or there may be another issue, such as a starter or alternator problem.
🔌 Don’t Get Stranded Again
A portable jump starter lets you restart your car without a second vehicle. Keep one charged in your trunk for road trips, emergencies, and cold mornings.
🆚 Jumper Cables vs. Portable Jump Starter
Both can help, but they are best for different situations. Here is a simple comparison:
| Feature | Jumper Cables | Portable Jump Starter |
|---|---|---|
| Needs a second car? | Yes | No |
| Typical price range | Lower cost | Higher cost, more convenience |
| Ease of use | Moderate | Very easy |
| Extra features | Usually none | USB charging, flashlight, air pump on select models |
| Best for | Budget backup option | Solo drivers, road trips, emergencies |
❌ Common Mistakes to Avoid
- Connecting clamps in the wrong order — always connect red first and black last.
- Grounding the final clamp on the dead battery instead of bare metal on the engine block.
- Letting clamps touch each other while connected, which can cause sparks.
- Forgetting to let the donor car run for a few minutes before attempting a start.
- Using damaged or thin cables that may not carry enough current.
🏆 Top-Rated Jump Starters & Cables on Amazon
Affiliate Disclosure: This section contains Amazon affiliate links using the tag tophprev-20. As an Amazon Associate, this site may earn from qualifying purchases at no extra cost to you.
If you are building a simple emergency kit for your trunk, these are the three product types worth comparing first.
Compact Portable Jump Starter
A portable battery pack is the easiest option because you do not need another vehicle. Look for reverse-polarity protection, enough peak amps for your engine size, USB charging, and a built-in flashlight.
View on Amazon →Heavy-Duty Jumper Cables
Choose thick, long cables for easier connections between vehicles. A 4-gauge, 16-foot set is a strong choice for many cars, SUVs, and light trucks.
View on Amazon →Roadside Emergency Kit
A roadside kit is useful for new drivers, long commutes, and road trips. Compare kits that include jumper cables, gloves, warning triangle, flashlight, tire tools, and a compact carry case.
View on Amazon →❓ Frequently Asked Questions
How long do I need to let a car run after a jump start?
Drive for at least 15–30 minutes, or let the engine idle that long, to give the alternator time to recharge the battery.
Can I jump start a car by myself?
Yes. With a portable jump starter, you do not need a second vehicle. Traditional jumper cables require a donor car.
Is it bad to jump start a car often?
Occasional jump starts are usually fine, but if your battery needs jumping repeatedly, it is likely failing and should be tested or replaced.
What is the correct order to disconnect jumper cables?
Remove the cables in the reverse order: black ground clamp first, then the other black clamp, then both red clamps.
Can jump starting damage my car’s electronics?
Using the correct clamp order, keeping clamps from touching, and grounding on bare metal away from the dead battery helps reduce the risk.

