
How to Test Car Battery Cables (Voltage Drop Test)

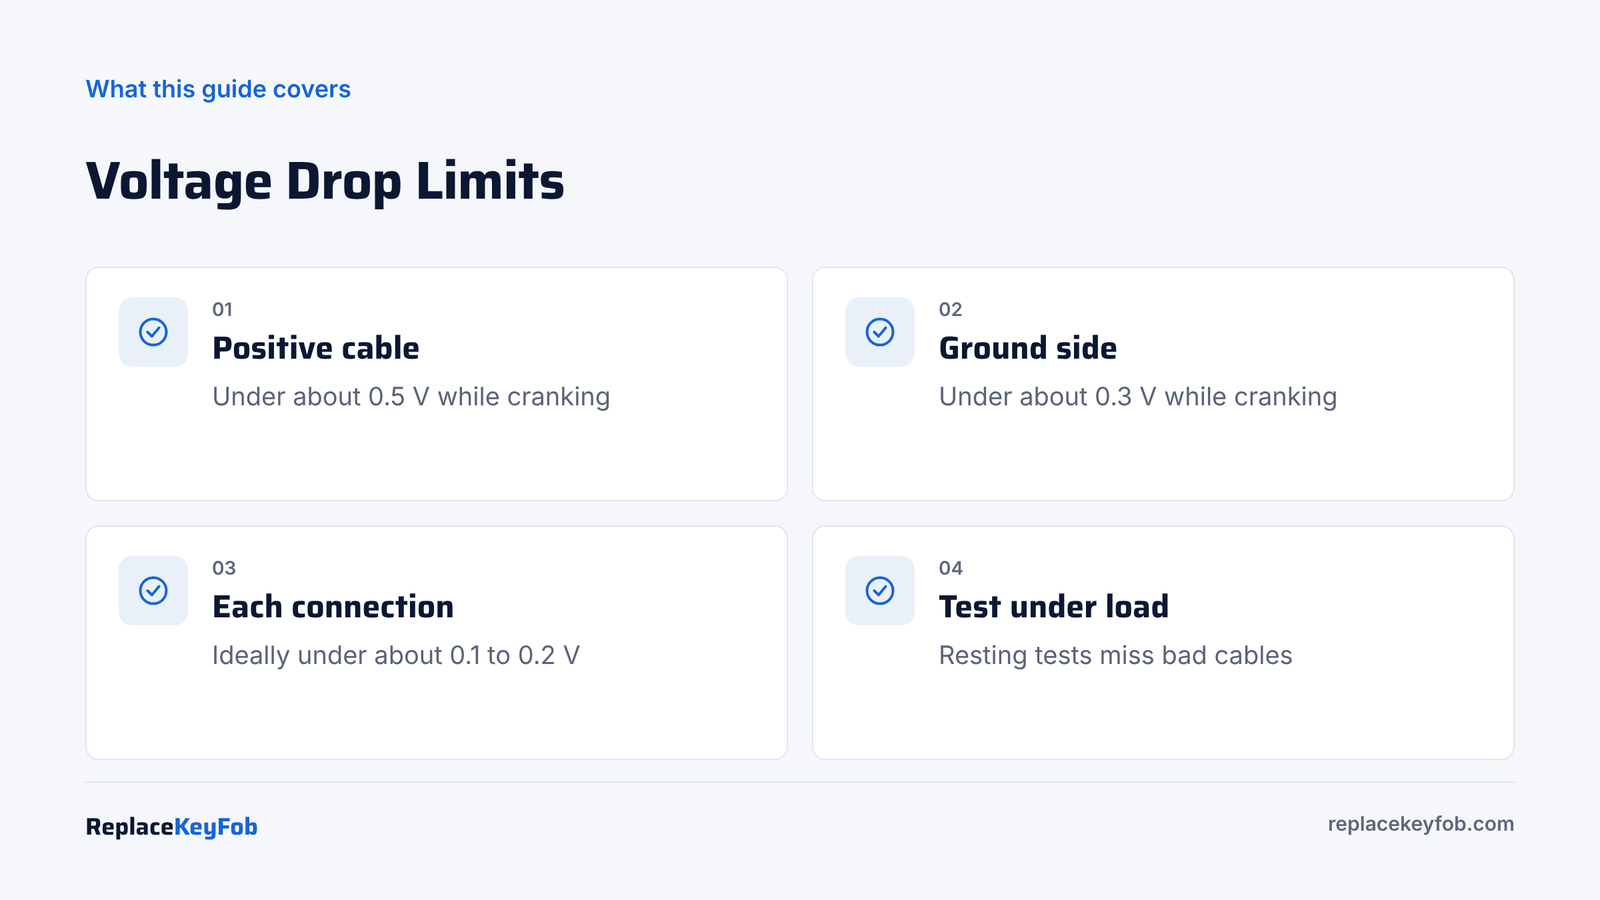
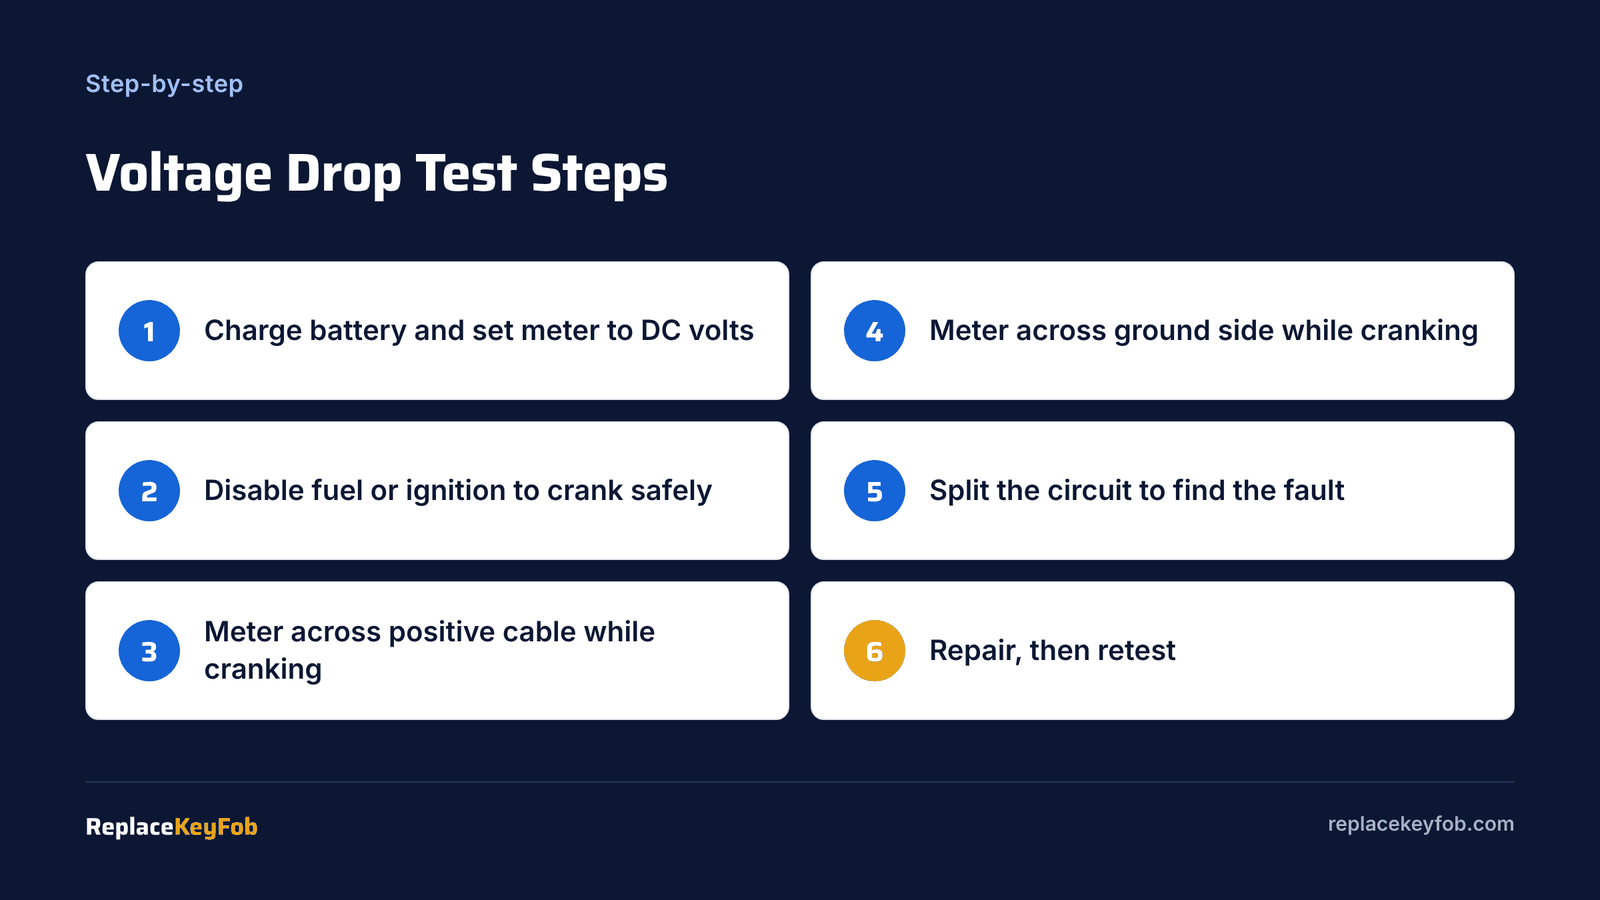
To test battery cables, do a voltage drop test. Set a multimeter to DC volts, put one probe on the battery post and the other on the far end of the cable, then crank the engine. More than about 0.5 volts on the positive cable, or about 0.3 volts on the ground side, means too much resistance in that cable or its connections.
A cable that looks perfect from the outside can still be corroded inside the insulation, or have a loose crimp at the starter. A simple resistance check with the meter’s ohms setting usually misses this, because the cable only shows its problem when hundreds of amps flow through it. The voltage drop test checks the cable while it is working, under real load, which is why mechanics trust it.
You need a basic digital multimeter, a helper, and about 15 minutes. If you have not used a multimeter on a car before, our guide on how to test a car battery with a multimeter covers the basics.
What a Voltage Drop Test Tells You
Every wire and connection has a little resistance. When current flows, that resistance “uses up” some voltage. A good cable loses very little. A bad one loses enough that the starter does not get full battery voltage, so it cranks slowly or just clicks.
The trick is to measure the voltage difference between the two ends of the same cable while it carries current. You are not measuring battery voltage. You are measuring how much voltage the cable wastes.
| Circuit tested | Probe placement | Acceptable drop while cranking |
|---|---|---|
| Positive cable | Battery positive post to starter B+ stud | Under about 0.5 V |
| Ground side | Battery negative post to engine block or starter case | Under about 0.3 V |
| Single connection | Across one clamp or joint | Ideally under about 0.1 to 0.2 V |
| Charging circuit | Alternator output stud to battery positive, engine running with loads on | Under about 0.5 V |
Limits vary a little between service manuals, but anything well past these numbers is a clear problem.
What You Need
- Digital multimeter with a DC volts range and, ideally, min/max capture
- Long test leads or jumper leads so you can reach the starter
- A helper to crank the engine
- A fully charged battery, because a weak battery gives misleading readings
- Safety glasses, and jack stands if you must reach under the car
Automotive Digital Multimeter
Choose a meter with a fast DC volts display, min/max hold, and long or extendable leads with sharp probes or clips.
As an Amazon Associate, ReplaceKeyFob earns from qualifying purchases.
Before You Start
- Charge the battery to about 12.6 volts at rest. Testing cables on a flat battery mostly measures the battery.
- Stop the engine from starting. Many cars can be cranked without starting by pulling the fuel pump fuse or relay. On some, holding the throttle to the floor triggers “clear flood” mode. Check the service information for your car. Push-start cars may not allow long cranking.
- Keep cranking short. Five seconds at a time is plenty, with a pause between tries to protect the starter.
- Stay clear of moving parts. Keep leads and hands away from belts and fans.
How to Voltage Drop Test the Positive Battery Cable
- Set the meter to DC volts, on a low range if it is not autoranging.
- Put the red probe on the battery positive post itself, not on the clamp. This includes the clamp connection in the test.
- Put the black probe on the starter’s large B+ stud, where the positive cable bolts on.
- Have your helper crank the engine for a few seconds.
- Read the meter while it cranks. Under about 0.5 V is good. Above that, the positive side has too much resistance.
How to Voltage Drop Test the Ground Side
- Put the red probe on the engine block or the starter case. Choose clean metal.
- Put the black probe on the battery negative post itself.
- Crank the engine and read the meter.
- Under about 0.3 V is good. Higher readings mean a bad negative cable, ground strap or ground point.
Why you probe the post, not the clamp
The clamp-to-post joint is one of the most common failure points. If you put the probe on the clamp, that joint is left out of the test and you can miss the problem. Starting on the post and working out lets you test the whole path.
Pinpoint the Bad Spot
If a test fails, split the circuit into sections and test each one while cranking. The section with the drop is your problem.
- Post to clamp: a drop here means a dirty or loose clamp. Clean and tighten it, or replace the clamp; see how to replace car battery terminal clamps.
- Clamp to cable: a drop across the crimp means corrosion inside the cable end.
- Along the cable: a drop from one end of the cable to the other, with good connections, means the copper inside is corroded. Replace the cable; see how to replace a car battery cable.
- Cable end to starter stud: a loose nut or corroded lug.
- Engine to body ground: a corroded ground strap causes dim lights and odd electrical faults as well as slow cranking.
Testing the Charging Circuit
The same idea works for the charging side. With the engine at about 2,000 rpm and the headlights, blower and rear defrost on, measure from the alternator output stud to the battery positive post. Then from the alternator case to the battery negative post. Too much drop on either side means the battery is not getting the alternator’s full output. You can also check the charging system with a scan tool; see how to test an alternator with an OBD2 scanner.
Reading the Results
| Reading while cranking | What it means | Action |
|---|---|---|
| Positive side 0.1 to 0.4 V | Normal | Look elsewhere if cranking is slow |
| Positive side 0.6 to 1.5 V | High resistance | Find the section and repair |
| Ground side over 0.3 V | Poor ground | Clean ground points or replace strap |
| Readings jump around | Loose connection | Tighten and retest |
| Meter shows battery voltage | Probe on wrong circuit or open cable | Check probe placement and cable continuity |
| Good cables, slow crank | Battery or starter problem | Load test the battery, then test the starter |
A Real-World Example
Here is how the test plays out on a typical slow-crank complaint. The battery tests good on a handheld tester and reads 12.6 volts at rest. While cranking, battery voltage at the posts stays at 10.4 volts, which is healthy. But the starter cranks slowly.
- Positive side, post to starter stud: 1.1 volts while cranking. That is more than double the limit.
- Split test, post to clamp: 0.05 volts. The clamp joint is fine.
- Clamp to the starter end of the cable: 1.0 volts. The loss is inside the cable.
- Peeling back the insulation near the battery shows green, powdery copper.
A new positive cable drops the reading to 0.2 volts and the engine cranks at normal speed. Without the test, the next guess would likely have been a new starter at several hundred dollars.
Do the same on the ground side
Ground problems are just as common, especially on older trucks and cars driven on salted roads. A single corroded engine-to-body strap can cause slow cranking, dim headlights and even a charging warning. Test the battery negative to engine block, then the battery negative to the body, and compare.
Mistakes to Avoid
- Testing at rest. With no current flowing, even a bad cable shows almost zero drop.
- Using a weak battery. Charge it first so you test the cables, not the battery.
- Cranking for too long. Starters overheat. Keep it to a few seconds per test.
- Probing painted surfaces. Paint gives false readings.
- Forgetting smaller grounds. Body and engine grounds affect lights, sensors and charging, not just cranking.
When to Call a Pro
If the readings point to cables buried under the intake or exhaust, or the starter is hard to reach, a shop may save time. Most shops charge about $50 to $150 for an electrical diagnosis, and battery cable replacement typically adds about $100 to $300 per cable. A free battery and charging test at a parts store is a good first step if you have no meter.
Frequently Asked Questions
Use a voltage drop test. Put one probe on the battery post and the other at the far end of the cable, then crank the engine. A drop above about 0.5 V on positive or 0.3 V on ground means a bad cable or connection.
You can check for a broken cable, but an ohmmeter cannot reliably find the small resistance that causes slow cranking. A voltage drop test under load is far more accurate.
Under about 0.5 V on the positive side and about 0.3 V on the ground side while cranking. Individual connections should ideally drop less than about 0.1 to 0.2 V.
The voltage drop test is a load test for cables. The starter provides the load. Crank the engine and measure the drop across each cable.
Yes. A corroded or loose cable can cause clicking, slow cranking or no crank at all, even with a healthy battery.