
How to Fix P0106 Without Replacing the Wrong Part

To fix P0106, first confirm the code with an OBD-II scanner, then inspect vacuum hoses, intake leaks, MAP sensor wiring, and live MAP data before replacing the sensor. P0106 means the engine computer sees a MAP or BARO sensor reading that does not match engine load, throttle position, or RPM.
- Check for vacuum leaks first.
- Inspect the MAP sensor connector.
- Compare live MAP data.
- Test the 5-volt reference.
- Replace the sensor last.
Your check engine light is on, the scanner shows P0106, and the car now feels rough, weak, or wasteful on fuel.
The common mistake is replacing the MAP sensor first. That can work, but it also wastes money when the true fault is a cracked vacuum hose, corroded connector, or incorrect intake pressure reading.
This takes about 8 minutes to read. Start with the fastest checks, then move into testing.
Key point: P0106 is not a “bad sensor” code by itself. It is a “sensor reading does not make sense” code.
P0106 Meaning and What Your Car Detected
P0106 means the powertrain control module detected a MAP or BARO sensor signal outside the expected range for current engine conditions. The MAP sensor measures intake manifold pressure so the engine computer can calculate fuel delivery and ignition timing. :contentReference[oaicite:0]{index=0}
The computer compares MAP sensor data with engine load, throttle position, RPM, intake air temperature, coolant temperature, and barometric pressure. If those signals do not agree, the computer stores P0106.
That is why P0106 needs diagnosis, not guesswork. A working sensor can report strange pressure when the intake has a vacuum leak.
- MAP sensor: measures intake manifold pressure.
- BARO sensor: measures atmospheric pressure.
- PCM or ECM: reads sensor data and controls fuel.
- Vacuum leak: changes manifold pressure without permission.
- Freeze frame: records engine data when the code sets.
For general OBD background, the U.S. EPA explains that onboard diagnostics help inspection programs use vehicle data for emissions checks through vehicle emissions on-board diagnostics.
Fix P0106 in the Right Order
The right repair order is vacuum leak check, wiring check, live data check, voltage test, then MAP sensor replacement. This order prevents the most common repair mistake.
Start with parts that fail for free or cheap. Rubber hoses split, connectors loosen, and intake boots crack before sensors fail.
Warning: Do not clear the code before saving freeze frame data. That data shows RPM, load, throttle position, and MAP reading when P0106 appeared.
- Scan the car and record freeze frame data.
- Check for related codes like P0105, P0107, P0108, lean codes, or misfire codes.
- Inspect vacuum hoses and the intake duct.
- Inspect the MAP sensor connector and wiring.
- Read live MAP data with key on, engine off.
- Compare idle MAP data with expected vacuum.
- Replace the MAP sensor only after testing confirms it.
RepairPal also recommends recording freeze frame data, duplicating code-setting conditions, and comparing MAP sensor data against engine load, throttle position, RPM, and road speed. :contentReference[oaicite:1]{index=1}
Vacuum Leaks Cause P0106 Often
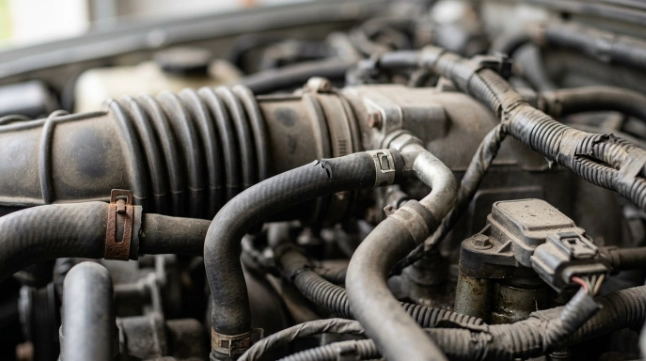
A vacuum leak can trigger P0106 because unmetered air changes intake manifold pressure. The MAP sensor reports the pressure it sees, but the computer decides that pressure does not match throttle angle and RPM.
Check the vacuum hose connected to the MAP sensor, intake manifold gasket area, brake booster hose, PCV hose, and intake duct after the mass airflow sensor.
A small split can open wider when the engine moves under load. That explains why some cars idle fine but stumble during acceleration.
| Area to Check | What to Look For | Why It Matters |
|---|---|---|
| Vacuum hoses | Cracks, loose ends, collapsed rubber | Leaks change manifold pressure |
| Intake boot | Tears after clamps or bends | Unmetered air affects load calculation |
| PCV system | Stuck valve or broken hose | Creates unstable idle vacuum |
| Intake gasket | Hissing, rough cold idle | Creates false pressure readings |
Best first repair: fix visible air leaks before buying a MAP sensor.
MAP Sensor Wiring and Connector Checks
MAP sensor wiring matters because the sensor depends on reference voltage, ground, and signal return. A loose pin or green corrosion can create the same P0106 result as a failed sensor.
Most three-wire MAP sensors use a 5-volt reference, a ground, and a signal wire. RepairPal notes that the connector should have steady 5-volt reference voltage and strong ground with the key on and engine off. :contentReference[oaicite:2]{index=2}
Do not pull hard on the wires. Back-probe carefully or use a proper breakout lead.
- Look for oil inside the connector.
- Check for bent or pushed-back terminals.
- Inspect wire insulation near the plug.
- Clean light corrosion with electrical contact cleaner.
- Repair broken wiring before replacing parts.
The most overlooked issue is connector tension. A terminal can touch during parking-lot testing, then lose contact when the engine vibrates.
Live Data Tests That Confirm the Fault
Live data confirms whether the MAP sensor reading makes sense. With key on and engine off, MAP pressure should sit near local barometric pressure because the engine is not creating vacuum.
At idle, MAP pressure should drop because the closed throttle creates intake vacuum. Mitsubishi service information gives example MAP readings of 101 kPa at sea level with key on, then 31–45 kPa at idle. :contentReference[oaicite:3]{index=3}
Those numbers are vehicle-specific, altitude-sensitive, and engine-dependent. Use them as a logic guide, not a universal specification.
Tip: If key-on MAP data is far from local barometric pressure, suspect the sensor, wiring, or reference voltage before chasing vacuum leaks.
Mitsubishi’s official diagnostic page also shows how manufacturers compare load value with MAP sensor output voltage for P0106 logic through DTC P0106 manifold absolute pressure diagnostics.
When to Replace the MAP Sensor
Replace the MAP sensor when vacuum hoses are sealed, wiring is clean, voltage is correct, and live data still reads wrong. Replacing it before those checks turns diagnosis into guessing.
A failed MAP sensor can cause rough idle, poor acceleration, black exhaust smoke, poor fuel economy, stalling, or hard starting. Edmunds lists several of these symptoms and warns that driving with P0106 can cause hesitation, reduced power, or stalling. :contentReference[oaicite:4]{index=4}
Choose an OEM or high-quality sensor when the test points to the sensor. Cheap sensors can create fresh drivability problems because the voltage curve does not match the computer’s expected range.
Use This Decision Block
- If hoses are cracked: replace hoses, clear code, then drive.
- If wiring is damaged: repair wiring before sensor replacement.
- If 5-volt reference is missing: diagnose circuit or PCM feed.
- If MAP data is frozen: test signal wire and sensor response.
- If all tests pass: inspect PCM updates or deeper engine faults.
What most people do not think to ask is whether the engine itself creates abnormal vacuum. Low compression, valve timing issues, or a restricted exhaust can make good sensors report bad-looking data.
What Most People Get Wrong About P0106
Most people get P0106 wrong because they treat it as a parts code. The code points to a pressure signal problem, not one guaranteed failed component.
Wrong belief one: “P0106 always means the MAP sensor is bad.” The code can come from vacuum leaks, wiring faults, connector corrosion, or engine performance problems.
Wrong belief two: “Clearing the code fixes the issue.” Clearing the code only erases stored data. The fault returns when the same pressure mismatch happens again.
Wrong belief three: “The car is safe because it still drives.” A car with P0106 can stall, hesitate, waste fuel, and run rich or lean under load.
Clemson University’s automotive electronics lab explains that OBD-II stores diagnostic information and scan tools help technicians pinpoint faults, not just read warning lights. For background, see its overview of on-board diagnostic systems.
P0106 Repair Cost and Time
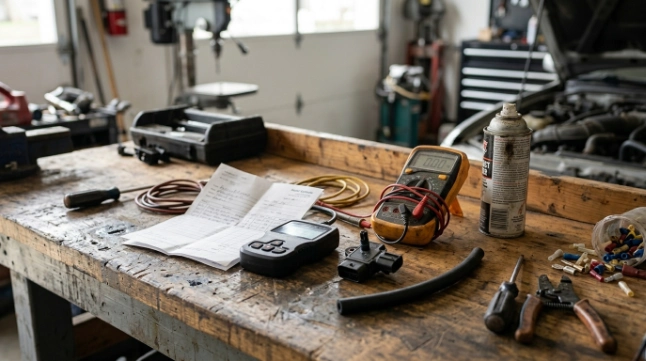
P0106 repair cost depends on the failed cause. A vacuum hose costs far less than a sensor, and wiring repair costs less than replacing multiple parts.
Most DIY checks take 20–45 minutes with a basic scanner and visual inspection. Voltage testing takes longer because you need a multimeter, wiring access, and correct pin identification.
| Repair | Common Cost Range | Difficulty |
|---|---|---|
| Vacuum hose replacement | $5–$40 | Easy |
| Connector cleaning | $10–$25 | Easy |
| MAP sensor replacement | $40–$220 | Easy to moderate |
| Wiring repair | $80–$250+ | Moderate |
The cheapest fix is the correct diagnosis. The expensive mistake is replacing the MAP sensor, then discovering a leaking intake hose.
Can You Drive With P0106?
You can drive a short distance with P0106 when the car runs smoothly, but you should not ignore it. Stop driving if the engine stalls, hesitates in traffic, smells rich, or lacks power.
The MAP sensor helps the computer control fuel and timing. Bad pressure data can make the engine run too rich or too lean.
Drive gently only to reach home or a repair location. Avoid highway merging, towing, long trips, and hard acceleration until the fault is fixed.
The smartest way to fix P0106 is to prove the pressure signal problem before replacing the MAP sensor.
As vehicles rely on more sensor cross-checking, live data comparison will keep becoming more valuable than simple code reading.
Before doing anything else, open your scanner and write down the freeze frame MAP, RPM, throttle, and load values.
Frequently Asked Questions
What is the fastest way to fix P0106?
The fastest way to fix P0106 is to check for cracked vacuum hoses and loose MAP sensor wiring first. Those faults are quick to find and cheap to repair. If those checks pass, use live data and voltage testing before replacing the MAP sensor.
Will a dirty throttle body cause P0106?
A dirty throttle body can contribute to unstable idle and airflow problems, but it is not the main cause of P0106. The code sets when MAP or BARO pressure data does not match expected engine conditions. Clean the throttle body only after checking leaks, wiring, and sensor data.
Can a bad mass airflow sensor cause P0106?
Yes, a bad mass airflow sensor can contribute to P0106 on vehicles that compare MAF, MAP, throttle, and load data. If MAF data is wrong, the computer can see a pressure mismatch. Check related MAF codes and live airflow data before replacing parts.
Does P0106 clear itself after repair?
P0106 can clear from the active warning light after successful drive cycles, but the stored history code can remain longer. Use a scanner to clear the code after repair. Then complete a test drive and confirm the monitor does not fail again.
Is P0106 serious?
P0106 is serious when the engine stalls, hesitates, smokes, or loses power. It affects air-fuel calculation, so the car can run poorly and waste fuel. Treat it as a moderate drivability fault and repair it before long driving.
