
How to Fix P0440: Diagnose the EVAP Code Without Guessing

Quick Answer
To fix P0440, start by confirming the code with an OBD2 scanner, then inspect the fuel cap, EVAP hoses, electrical connectors, purge valve, vent valve, and charcoal canister. If nothing obvious is damaged, the next useful step is usually an EVAP smoke or pressure test rather than replacing parts at random. You can also review general automotive assistance information from AAA if you need professional help.
Quick P0440 Repair Order
- Confirm the code: Record P0440, pending codes, permanent codes, and freeze-frame data before clearing anything.
- Check the fuel cap: Look for a loose cap, damaged seal, cracked housing, debris, or corrosion around the filler neck.
- Inspect EVAP hoses: Look for disconnected, split, collapsed, rubbed-through, or fuel-soaked vapor lines.
- Check connectors: Inspect purge, vent, pressure-sensor, and leak-detection-system wiring where fitted.
- Test the valves: Verify purge and vent valve operation instead of replacing either component based on the code alone.
- Smoke-test the system: Use the manufacturer-approved diagnostic procedure when visual checks do not reveal the leak or fault.
Most Important Tip
- Do not assume P0440 means the gas cap is bad. It identifies an EVAP system fault, and several different leaks or electrical problems can trigger it.
P0440 looks simple because people often call it a “gas cap code.” In practice, I treat it as an EVAP system clue rather than a parts-replacement instruction.
I’ve seen loose caps cause it, but I’ve also found cracked hoses, stuck valves, damaged connectors, and leaks that only became obvious during a smoke test.
In This Guide
What Does P0440 Mean?
P0440 is a generic OBD-II diagnostic trouble code related to the vehicle’s evaporative emission control system, usually called the EVAP system.
The EVAP system prevents gasoline vapors from escaping freely from the fuel system into the atmosphere.
What does the EVAP system do?
Your fuel tank naturally produces gasoline vapor as temperatures and fuel levels change. The EVAP system stores and controls those vapors instead of simply venting them outside.
A typical system can include several components:
- Fuel cap: Seals the fuel filler opening on vehicles that use a removable cap.
- Charcoal canister: Stores fuel vapor until the engine can burn it.
- Purge valve: Controls vapor flow from the canister toward the engine.
- Vent valve: Controls outside-air flow through the EVAP system during normal operation and testing.
- Vapor hoses: Connect the fuel tank, canister, valves, and engine.
- Pressure or vacuum sensor: Helps the powertrain control module monitor EVAP system pressure on many vehicles.
- Leak-detection equipment: Some vehicles use pumps or other hardware to help run system self-tests.
A diagnostic trouble code, or DTC, tells you what the computer detected. It does not automatically identify the failed part.
Does P0440 tell you the size of the leak?
Not necessarily. P0440 is broader than some EVAP codes that specifically indicate small or large leaks.
That distinction matters because replacing the fuel cap just because P0440 appears can waste time.
A related code may provide more direction. Always scan for every stored and pending code before starting repairs.
Locksmith’s diagnostic note: I use the same rule with electronic key faults and engine codes: read the fault as evidence, not as a direct command to replace a component.
What Causes the P0440 Code?
P0440 can appear when the computer cannot complete an EVAP self-test or detects an EVAP system problem. Common causes range from a simple sealing issue to a failed valve or damaged hose.
Start with the easiest possibilities before moving toward advanced testing.
1. Loose, missing, or damaged fuel cap
A poorly sealed fuel cap can prevent the system from holding the pressure or vacuum expected during an EVAP test.
Inspect the cap rather than tightening it blindly.
- Check whether the cap is fully seated.
- Inspect its rubber seal for cuts, flattening, or deterioration.
- Check the plastic cap body for cracks.
- Inspect the filler-neck sealing surface.
- Remove dirt or debris that may prevent proper sealing.
- Confirm the cap is intended for the vehicle.
Capless fuel systems use different sealing arrangements, so they require vehicle-specific inspection procedures.
2. Cracked or disconnected EVAP hose
Vapor hoses live around heat, road debris, fuel vapors, and moving vehicle components. Age can make some hoses brittle.
Look closely around connections rather than inspecting only long, easy-to-see sections.
- Cracks near hose ends.
- Loose quick-connect fittings.
- Rub-through against brackets.
- Heat damage near the exhaust.
- Collapsed or kinked lines.
- Previous repairs with incorrect hose.
3. Faulty purge valve
The purge valve controls when stored fuel vapor enters the engine. A valve that leaks or fails electrically can interfere with the EVAP system’s expected behavior.
P0440 alone does not prove the purge valve is bad.
Other symptoms or codes may provide stronger evidence. Testing can include electrical checks, scan-tool commands, or flow testing depending on the vehicle.
4. Faulty EVAP vent valve
The vent valve must operate correctly so the system can breathe during normal operation and seal during certain diagnostic tests.
Dirt, moisture, corrosion, wiring faults, or internal mechanical failure can cause trouble.
Vent valves mounted underneath the vehicle may be exposed to road contamination. Inspect the connector and surrounding area carefully.
5. Damaged charcoal canister
The charcoal canister stores fuel vapor. Physical damage, contamination, or internal deterioration can create EVAP problems.
A common mistake is repeatedly “topping off” the tank after the fuel pump nozzle clicks off.
Follow the vehicle manufacturer’s fueling instructions and avoid intentionally forcing excess fuel into the tank.
6. Electrical or sensor problem
Some P0440 cases are electrical rather than physical leaks.
- Broken wiring.
- Corroded terminals.
- Loose connectors.
- Failed pressure sensors.
- Open or shorted valve circuits.
- Problems with vehicle-specific leak-detection equipment.
Check related codes because they can point toward a circuit before you start searching for an invisible leak.
Section Takeaway: P0440 has several possible causes. A loose fuel cap is worth checking first, but the code does not prove the cap caused the fault.
How Do You Diagnose P0440 Before Replacing Parts?
The best P0440 diagnosis moves from scan data and simple inspections toward targeted testing. Do not clear the code before recording useful information.
Step 1: Scan all available codes
Connect your OBD2 scanner and record every stored, pending, and permanent powertrain code.
Also save freeze-frame information when your scanner provides it.
Look especially for other EVAP-related codes because they may narrow the search to a valve, circuit, pressure problem, or particular leak condition.
Step 2: Check emissions readiness monitors
Your scanner may display I/M readiness monitors. These show whether the vehicle has completed specific emissions-system self-tests.
An EVAP monitor marked incomplete is not automatically proof of a failure. It may simply mean the required operating conditions have not occurred since codes were cleared or battery power was disconnected.
For general vehicle safety and recall information, drivers can also use the National Highway Traffic Safety Administration website.
Step 3: Perform a complete visual inspection
Start at the easiest access points and work methodically.
- Fuel cap and filler neck.
- Visible vapor hoses.
- Charcoal canister.
- Purge valve and connector.
- Vent valve and connector.
- Harness sections near hot or moving components.
- Fuel tank area where safely visible.
- Anything recently repaired or disturbed.
I pay extra attention to hose connections because tiny splits can hide directly behind clamps or fittings.
That simple inspection sometimes saves an unnecessary valve replacement.
Step 4: Review scan-tool data
A more capable OBD2 scanner may display EVAP pressure or purge-command information on vehicles that support those parameters.
Do not judge a component from one number unless you know the manufacturer’s expected specification.
Vehicle-specific EVAP strategies vary. Use factory service information for the exact year, engine, and emissions configuration.
Step 5: Test purge and vent operation
Testing methods depend on system design.
- Confirm power and ground where required.
- Check wiring continuity according to service information.
- Inspect connector terminal tension.
- Test valve sealing or flow using the proper procedure.
- Use bidirectional scan-tool commands when the vehicle and scanner support them.
Never apply arbitrary voltage or vacuum to a component without knowing its design.
Pro tip: electrical testing should follow the correct wiring diagram. Connector pin assignments and valve control strategies differ among vehicles.
Step 6: Smoke-test the EVAP system
A smoke machine introduces controlled diagnostic vapor into the system so leaks can become visible.
This is often the most efficient next step after visual inspection finds nothing.
A smoke test may reveal leaks around:
- Hose connections.
- Canister housings.
- Valve bodies.
- Fuel filler components.
- Tank-area seals.
- Other EVAP joints.
Fuel-vapor systems require proper equipment and procedures. Avoid improvised pressure sources or anything that can ignite fuel vapors.
Section Takeaway: save the scan data, inspect simple failure points, test valves, then use a proper EVAP leak test. This order reduces guesswork and unnecessary parts replacement.
How Do You Fix P0440 Step by Step?
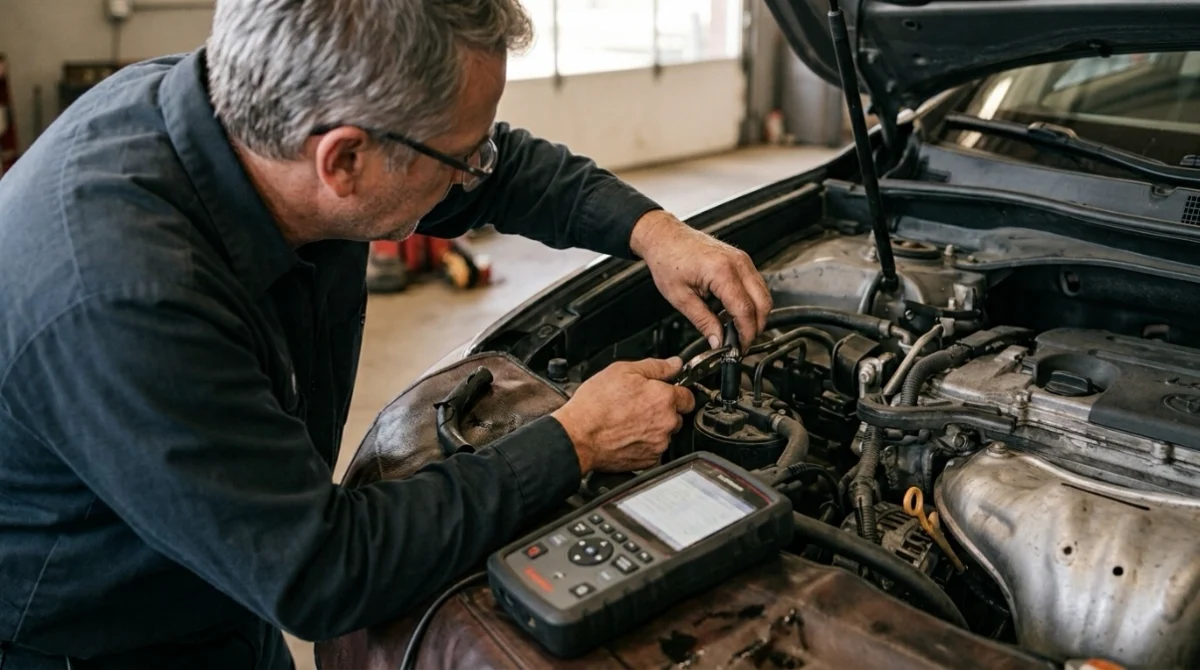
The correct P0440 fix is the repair that addresses the fault you verified. There is no single replacement part that fixes every P0440 case.
Use this repair order as a practical guide.
1. Correct an obvious fuel-cap problem
If the cap was loose, reinstall it correctly and inspect its condition.
Replace it only if testing or inspection shows damage, poor sealing, or incorrect fitment.
On capless systems, inspect the manufacturer-specific filler sealing mechanism rather than trying to apply conventional cap advice.
2. Repair damaged EVAP hoses or fittings
Replace cracked, leaking, disconnected, or otherwise defective vapor-system parts with components suitable for the vehicle and application.
A generic piece of hose is not automatically suitable for fuel-vapor service.
3. Repair connector or wiring faults
Fix damaged wires, loose terminals, corrosion, broken connector locks, and poor grounds according to proper automotive electrical repair practices.
After the repair, verify that the circuit operates correctly rather than assuming the new connection solved the problem.
4. Replace a failed purge valve only after testing
If testing confirms the purge valve leaks, sticks, or has an electrical failure, replacement may be appropriate.
Use the vehicle’s service information for removal and installation details.
5. Replace a failed vent valve only after testing
A vent valve that cannot seal or operate correctly can prevent the EVAP system from completing its self-test.
Inspect the surrounding filter, hoses, and connector before condemning the valve.
6. Repair a leaking canister or other EVAP component
If smoke testing identifies a damaged canister, seal, fitting, tank-area connection, or another component, repair that confirmed leak.
The exact component layout differs substantially between vehicles.
7. Clear codes and verify the repair
After repairing the confirmed cause, clear the stored diagnostic codes when appropriate.
Then operate the vehicle normally and rescan it.
The EVAP monitor may not complete immediately. EVAP self-tests often require specific fuel level, temperature, soak, speed, and operating conditions determined by the manufacturer.
Do not repeatedly clear codes just to turn off the check-engine light. Clearing them resets useful diagnostic information and can also reset emissions readiness monitors.
Manufacturer-specific information is especially important here. Owners can consult resources such as Honda MyGarage when working on a supported Honda vehicle rather than assuming a generic drive cycle or test sequence.
Mechanic’s note: never invent a drive cycle from memory. Follow the official service information for your year, make, model, engine, and emissions package.
P0440 DIY checks vs professional diagnosis
| Task | DIY Friendly? | Typical Tools | Why It Matters |
|---|---|---|---|
| Read and record P0440 | Yes | OBD2 scanner | Confirms the fault and preserves diagnostic clues |
| Inspect fuel cap | Yes | Visual inspection | Rules out a simple sealing problem |
| Inspect visible hoses | Often | Flashlight and safe access | Finds obvious cracks or disconnections |
| Electrical valve testing | Intermediate | Multimeter, wiring diagram, scan tool | Separates wiring faults from component failures |
| EVAP smoke test | Usually professional | Approved smoke machine and adapters | Locates leaks that visual inspection misses |
Section Takeaway: fix only the failure you can prove. If visual checks do not reveal the problem, testing is usually cheaper than replacing several EVAP components blindly.
Can You Drive With a P0440 Code?
A vehicle with only P0440 may still seem to drive normally because the EVAP system mainly manages fuel vapor rather than basic engine operation.
That does not mean you should ignore the warning light.
When should you stop and investigate immediately?
Do not assume every check-engine light is harmless just because P0440 is present.
Arrange prompt diagnosis if you notice any of these conditions:
- Strong raw-fuel odor.
- Visible liquid fuel leakage.
- Hard starting after refueling.
- Stalling or severe rough running.
- Other engine or fuel-system codes.
- A flashing check-engine light.
A flashing check-engine light commonly indicates a more urgent engine problem than a standalone EVAP code. Reduce driving and have the vehicle evaluated.
Will P0440 affect an emissions inspection?
It can. An active emissions-related malfunction or incomplete readiness monitors may affect inspection results depending on local rules.
Clearing the check-engine light immediately before an inspection is not a reliable solution because readiness monitors may reset to incomplete.
Fix the underlying problem first. Then allow the vehicle to complete the required self-tests.
For broader crash, recall, and vehicle-safety research, the Insurance Institute for Highway Safety provides independent vehicle safety information, although EVAP repair procedures should come from vehicle-specific service data.
How Much Does It Cost to Fix P0440?
P0440 repair cost varies widely because the code can result from anything from a sealing problem to a hard-to-find vapor leak or electrical fault.
Your vehicle’s make, model, year, labor rate, component access, and diagnosis time all affect the final bill.
What determines the repair cost?
- Diagnosis time: An obvious loose connection is faster to identify than an intermittent leak.
- Part required: A cap, hose, valve, canister, sensor, or wiring repair can have very different costs.
- Component location: Some EVAP parts are easy to reach, while others sit near the tank or underneath the vehicle.
- Vehicle design: Some systems use extra leak-detection hardware or manufacturer-specific testing procedures.
- Local labor rates: Repair costs differ by region and shop.
For that reason, I would not approve an expensive EVAP component simply because a scanner displays P0440.
Paying for diagnosis can save money when the alternative is buying several unproven parts.
Expert referral: ask the shop what test confirmed the failed component. A smoke-test result, circuit test, or valve test is more meaningful than “P0440 usually means this part.”
Dealership vs independent shop vs DIY
| Option | Best For | Main Advantage | Main Limitation |
|---|---|---|---|
| DIY diagnosis | Cap checks, scanning, visible hose inspection | Low initial labor cost | Leak-testing equipment and service data may be needed |
| Independent repair shop | Most EVAP diagnosis and repair | Professional smoke testing and electrical diagnosis | Capabilities vary by shop |
| Dealership | Complex manufacturer-specific problems | Factory procedures and brand-specific equipment | Labor rates may be higher in some markets |
Section Takeaway: there is no trustworthy single P0440 repair price without knowing the failed component. Diagnose the system first, then price the confirmed repair.
P0440 Frequently Asked Questions
Can a loose gas cap cause P0440?
Yes. A loose, damaged, missing, or incorrectly sealing fuel cap can contribute to an EVAP fault on vehicles that use a conventional cap. However, P0440 does not prove the cap is responsible, so inspect the rest of the system if the code returns.
Will tightening the gas cap clear P0440 immediately?
Not always. Even after correcting a cap problem, the computer may need to run and pass another EVAP self-test before the warning light turns off naturally. The required operating conditions vary by vehicle.
Can I clear P0440 with an OBD2 scanner?
Most basic OBD2 scanners can clear many stored engine codes, including P0440. Clearing the code does not repair the cause, and it may reset emissions readiness monitors. Record diagnostic information before erasing anything.
Does P0440 mean the purge valve is bad?
No. A purge valve problem is one possible cause, but P0440 may also involve a fuel-cap seal, hose leak, vent valve, canister, sensor, wiring fault, or another EVAP component. Test the purge valve before replacing it.
Can a bad EVAP vent valve cause P0440?
Yes. If the vent valve cannot open, close, or seal as commanded, the system may fail its EVAP self-test. Dirt, corrosion, wiring damage, or internal valve failure can all affect operation.
Do I need a smoke test for P0440?
Not in every case. Start with code retrieval, fuel-cap inspection, hoses, connectors, and visible EVAP components. If those checks do not identify the problem, a properly performed smoke test is often one of the fastest ways to locate a hidden leak.
Why did P0440 return after I replaced the gas cap?
The replacement cap may not have been the actual cause, may not seal correctly, or another leak may exist elsewhere in the EVAP system. Rescan for related codes and diagnose the complete system instead of installing another cap.
Final Takeaway: Fix the Cause, Not Just the P0440 Code
The safest way to fix P0440 is to diagnose the EVAP system in a logical order. Confirm the code, save the scan data, inspect the cap and hoses, check valves and wiring, then smoke-test the system if needed.
Do not let a generic trouble code turn into a pile of replacement parts.
If you lack the equipment to test EVAP valves or safely perform a leak test, ask a qualified repair shop to prove the failure before replacing expensive components.
