Best Settings for Dual Dash Cam to Capture Every Detail
Choose balanced resolution, moderate bitrate, and proper exposure for both cameras. Then test parking mode, rear placement, and storage performance in real driving conditions.
Dual dash cams can be a smart upgrade if you want coverage in front and behind your vehicle, but the wrong settings can leave you with shaky, overcompressed, or unreadable footage. The best settings for dual dash cam use depend on your car, your storage capacity, and whether you care more about daytime evidence, nighttime plates, or parking security.
- Balance matters: Use settings that stay clear without overwhelming storage.
- Front and rear differ: Tune each camera for its own lighting and angle.
- Parking mode needs care: Battery protection prevents drain and missed events.
- Placement is critical: Bad mounting can ruin even the best settings.
Best Settings for Dual Dash Cam: What Drivers Want to Capture in 2025
Most drivers want the same thing from a dual dash cam: clear evidence when something happens and enough detail to identify vehicles, lane position, and road conditions. In 2025, that usually means balancing sharp image quality with reliable recording, stable power, and enough storage for long drives.
The ideal setup is not always the highest resolution available. A better approach is to choose settings that match your vehicle, your commute, and the lighting conditions you face most often. If you also use other vehicle electronics, such as an OBD2 scanner for checking warning lights, it helps to think about your dash cam as part of a larger safety and diagnostics setup, not just a camera.
How Dual Dash Cams Work and Why the Right Settings Matter
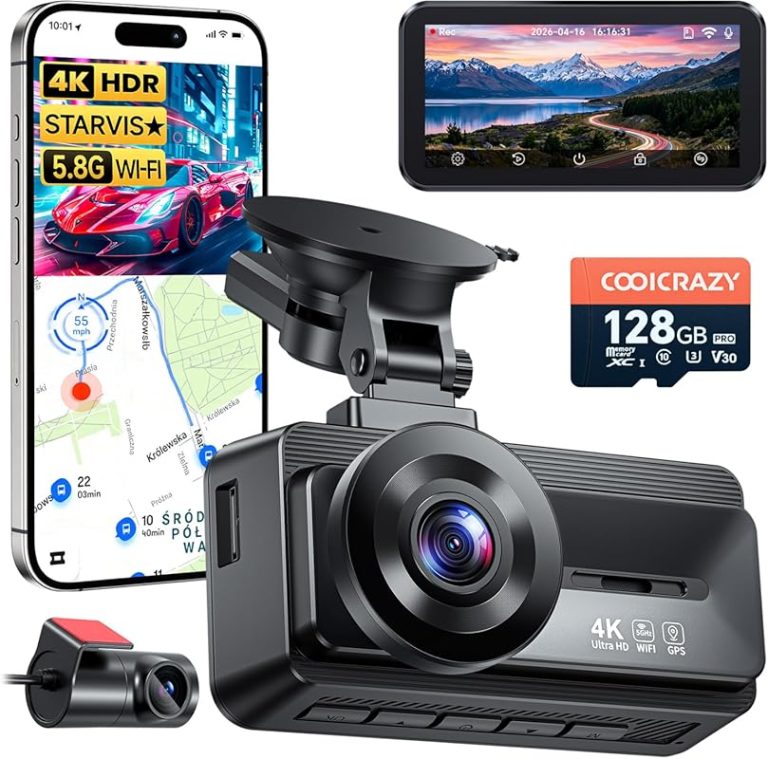
A dual dash cam records two views at the same time, usually from a front camera and a rear camera. Some systems use one main unit with a rear module, while others have two separate lenses or a front unit linked to a rear camera by cable.
The settings matter because each camera may face different lighting, motion, and distance challenges. A front camera needs to capture fast-moving traffic and signs, while a rear camera often deals with tinted glass, headlights, and wider distance gaps.
Front vs. rear recording roles
The front camera is usually the priority because it captures lane position, intersections, and most collision evidence. It should focus on clarity, plate readability, and stable exposure in changing light.
The rear camera is just as important for rear-end impacts, tailgating, and parking incidents. It often needs a wider field of view and stronger low-light performance because rear glass and cabin tint can reduce detail.
How resolution, frame rate, and compression affect evidence quality
Resolution determines how much detail the camera can capture, but it is only one part of image quality. Frame rate affects how smooth motion looks, while compression controls how much detail gets preserved after the footage is saved.
Higher compression can reduce file size, but it may blur fine details like plates, road signs, and distant vehicles. The best balance is usually a setting that keeps footage sharp enough for evidence without filling the memory card too quickly.
Vehicle Compatibility and Installation Factors Before Adjusting Settings
Before changing settings, make sure the camera is installed correctly and powered in a way that matches how you want to use it. A great camera with poor placement or weak power management will still produce disappointing results.
Vehicle layout also matters. A setup that works well in a compact sedan may need different cable routing, rear placement, or parking-mode support in an SUV, pickup, or work van.
12V outlet vs. hardwire setup for continuous parking mode
A 12V outlet is the simplest power option and usually works well for driving-only recording. It is easy to install and remove, but it may shut off with the ignition and limit parking mode use.
A hardwire setup can support continuous parking mode and cleaner cable routing, but it must be installed carefully. If you are unsure about fuse taps, battery protection, or electrical load, a qualified installer can help prevent drain or wiring mistakes.
Compatibility with sedans, SUVs, trucks, and commercial vehicles
Sedans often offer the easiest rear-camera routing because the cabin is smaller and the rear glass is closer to the front unit. SUVs and trucks may need longer cables and more careful placement to avoid sagging or exposed wires.
Commercial vehicles can be even more complicated because of larger cabins, partitions, and different power setups. In those cases, the best settings for dual dash cam use may depend on whether the camera is covering private driving, fleet use, or parked security.
Rear camera cable length, placement, and windshield tint considerations
Rear camera cable length should be long enough to reach the back glass without tight bends or tension. If the cable is too short, drivers often mount the rear camera in a compromise position that hurts coverage.
Tint can also reduce rear image quality, especially at night. If your rear window is heavily tinted, you may need to adjust exposure, lower compression, or reposition the camera to reduce glare and preserve detail.
Dual dash cam performance depends on the whole setup, not just the camera specs. Mounting angle, cable routing, and power source can change image quality as much as menu settings.
Best Dual Dash Cam Settings for Clear Daytime and Nighttime Footage
The best settings are usually different for daytime and nighttime, but you still want one default profile that stays reliable in both conditions. For most drivers, a balanced setup is better than chasing the highest numbers in every menu.
Think of the front camera as the detail capture unit and the rear camera as the coverage unit. That mindset makes it easier to choose settings that fit real-world driving rather than marketing claims.
Resolution and frame rate recommendations for front and rear cameras
For the front camera, a higher resolution is useful if the system and memory card can handle it without dropping frames. If your dash cam offers multiple options, choose the setting that keeps license plates and signs readable while maintaining stable recording.
For the rear camera, a slightly lower resolution can be acceptable if it improves reliability and storage life. A stable frame rate is often more valuable than the highest pixel count, especially in stop-and-go traffic where motion blur can hide important details.
Many drivers prefer a setting that records smoothly without overheating or overloading storage. If you are comparing camera behavior to other vehicle data tools, the same idea applies as with freeze frame versus live data: the best result is the one that captures the right information clearly when you need it.
Exposure, HDR/WDR, and low-light tuning for license plates and road signs
Exposure should be set so the image is bright enough to show detail without washing out headlights or reflective signs. If your dash cam allows manual exposure control, start with a neutral setting and adjust only if footage looks too dark or too bright.
HDR or WDR can help balance bright and dark areas, especially at sunrise, sunset, and in tunnel exits. These features are often useful for plate capture, but they can also soften the image if the camera overprocesses the scene.
For nighttime tuning, avoid pushing brightness too far. A slightly darker image with preserved contrast is often more useful than a bright image that turns headlights into white blobs.
Bitrate, loop recording, and compression settings for balanced storage
Bitrate is one of the most overlooked settings in dual dash cam setup. Higher bitrate usually preserves more detail, which is especially helpful for plates, road signs, and fast motion, but it also uses more storage.
Loop recording should be enabled so the camera keeps recording when the card fills up. Choose a loop length that fits your driving habits, and make sure the card has enough capacity for the file sizes your chosen resolution creates.
Compression should stay moderate when possible. Too much compression can make footage look fine on the screen but poor when you zoom in later for evidence.
Parking Mode, Motion Detection, and G-Sensor Settings for Security
Parking mode can be one of the biggest reasons to buy a dual dash cam, especially if you worry about hit-and-run damage or vandalism. The right settings help the camera wake up when something happens without draining the battery or recording every passing shadow.
If you want reliable security coverage, parking settings should be tested in your own driveway or garage before you trust them in public. Real-world sensitivity is often very different from what the menu suggests.
Best parking mode options for hit-and-run and vandalism protection
Buffered parking mode is often the most useful option because it can save a short clip before and after an impact or motion event. That extra pre-event time can help identify the vehicle or person involved.
Time-lapse parking mode can be useful when you want long-term coverage with lower power use. It captures the scene at intervals, which saves storage and battery, but it may miss very fast incidents if there is no impact trigger.
For drivers who park in higher-risk areas, a combination of motion and impact detection is often the most practical approach. If the vehicle is older or has a battery concern, a careful power plan matters just as much as the camera settings.
Motion sensitivity and impact detection settings to reduce false alerts
Motion sensitivity should be set high enough to catch people approaching the car, but not so high that it records every moving tree branch or passing headlight. Start in the middle, then lower sensitivity if the camera triggers too often.
Impact detection, or G-sensor sensitivity, should be strong enough to lock real events without reacting to every bump in the road. Too much sensitivity can fill your memory card with locked clips, while too little may miss a meaningful hit.
If your camera offers separate front and rear sensitivity, tune them independently. Rear parking events often need different settings because they may happen closer to the lens and with more glare.
Power management, battery drain, and hardwire kit considerations
Parking mode can drain a vehicle battery if it runs too long without protection. A hardwire kit with low-voltage cutoff is usually the safer way to support extended parking features, but the exact behavior may vary by vehicle and kit.
If you are not sure how much reserve your battery has, avoid assuming the dash cam will shut itself off at the right time. A qualified automotive technician can help with electrical concerns, especially if the vehicle already has battery issues or other aftermarket accessories.
Do not rely on parking mode without checking battery protection settings. A poorly configured hardwire install can leave you with a dead battery and no footage.
Practical Setup Steps to Dial In the Best Settings for Dual Dash Cam
Once the camera is mounted, the fastest way to improve results is to set it up carefully and test it under real driving conditions. Small setup errors can cause more problems than the settings themselves.
A methodical setup also makes troubleshooting easier later. If footage looks bad, you will know whether the issue is angle, power, memory card performance, or recording settings.
Initial formatting, firmware updates, and time/date accuracy
Start by formatting the memory card in the camera if the manufacturer recommends it. This helps reduce file errors and gives you a clean starting point before you change settings.
Check for firmware updates from the camera maker, since updates may improve stability, parking mode behavior, or video processing. Also make sure the time and date are accurate, because incorrect timestamps can weaken footage as evidence.
Set the time zone, date, and 24-hour format before your first drive so every clip is easier to review later.
Angle adjustment for front cabin, rear traffic, and blind-spot coverage
The front camera should show the road ahead, a small amount of hood if needed, and enough sky to balance exposure. Avoid pointing it too low, or you may miss traffic lights and distant plates.
The rear camera should cover the lane behind your vehicle without being blocked by headrests, tint strips, cargo, or wiper hardware. For SUVs and trucks, check whether the rear lens is capturing the full lane or only the back glass area.
If you want help thinking about camera coverage the same way you would think about vehicle sensor data, compare your footage goals to the logic used in stored versus pending codes: what matters is capturing the issue at the right moment, not just recording everything.
Test-drive method for verifying clarity, sound, and event locking
Take a short test drive in daylight and another at night if possible. Review the clips on a computer or phone, not only on the camera screen, because small displays can hide problems.
Check whether plates are readable at a safe distance, whether audio is usable, and whether the camera locks important clips when you trigger a bump or test button. If the rear view looks too dark, adjust exposure or tint-related placement before assuming the camera is defective.
Format the card, update firmware, and confirm the clock before changing advanced settings.
Choose stable resolution, moderate bitrate, and sensible exposure for both cameras.
Review real footage, then adjust angle, sensitivity, or parking settings one change at a time.
Common Dual Dash Cam Mistakes That Reduce Video Quality
Many dash cam complaints come from setup mistakes rather than bad hardware. The good news is that most of these issues can be fixed without replacing the camera.
If you are not getting the footage you expected, review the basics first: storage, placement, power, and settings. Those four areas explain most quality problems.
Overusing ultra-high resolution without enough storage
Ultra-high resolution can look impressive, but it may shorten recording time and increase the chance of skipped files if the memory card is too slow. Some drivers choose the highest setting and then wonder why the camera struggles.
A better choice is the highest setting your card and camera can handle consistently. Reliable recording is more useful than a spec sheet number that looks good on paper.
Incorrect rear camera placement or blocked lens view
A rear camera that is mounted too low, too high, or behind a blocked section of glass will miss useful detail. Tint bands, cargo covers, and headrests can all reduce the value of the footage.
Before changing settings again, inspect the physical view first. If the lens cannot clearly see the lane behind you, no menu adjustment will fully fix that problem.
Ignoring privacy, local recording laws, and safe mounting practices
Dash cam use can involve privacy and recording rules that vary by location. Drivers should check local laws and avoid mounting the camera where it blocks the road view or interferes with airbags.
Safe placement matters for both visibility and protection. If a mount or cable could affect safety equipment, have the installation reviewed by a qualified technician.
Some vehicles have unique trim, sensor, or windshield layouts that affect camera placement. Compatibility and installation details can vary by year, make, model, and region.
Final Recap: Choosing the Best Settings for Dual Dash Cam in 2025
The best settings for dual dash cam use are the ones that give you clear, dependable footage in the conditions you actually drive in. For most drivers, that means balanced resolution, moderate bitrate, sensible exposure, and parking settings that protect the car without draining the battery.
Start with a careful install, test the front and rear views, and then fine-tune one setting at a time. If your vehicle has unusual power, tint, or security requirements, a qualified installer or automotive technician can help you avoid damage and get the most from the system.
Frequently Asked Questions
Check the card type, capacity, and whether it is formatted correctly for the camera. Also confirm parking mode voltage cutoff if your setup uses a hardwire kit.
Night blur often comes from exposure, compression, or poor placement rather than resolution alone. Try adjusting HDR or WDR, lowering sensitivity to glare, and checking that the rear lens is not blocked or tinted too heavily.
No, dash cams do not program keys, and most consumer OBD2 tools cannot program immobilizer systems. Lost-all-keys situations or security-code access usually require a qualified locksmith, dealer, or certified technician.
Check your vehicle year, make, model, trim, and windshield layout before buying. Compatibility can vary by region, power source, tint, and whether the camera needs a 12V outlet or hardwire kit.
Verify the seller reputation, return policy, warranty terms, and whether the product matches your vehicle needs. For vehicle electronics, compare fitment details carefully before purchase.
Contact a qualified technician if installation could affect airbags, vehicle wiring, battery health, or security systems. Professional help is also wise when the vehicle has unusual electrical behavior or you are unsure about hardwire setup.