How to Install Premium Dash Cam in Easy Steps
Install a premium dash cam by choosing the right power source, mounting it behind the mirror, and routing cables safely out of view. Test recording, GPS, and parking mode before finishing the job.
Installing a premium dash cam is one of the smartest upgrades you can make for daily driving, parking security, and accident evidence. The best results come from choosing the right power source, mounting the camera correctly, and routing cables cleanly so the system works without distracting you.
This guide explains premium power and adapter options, front and rear camera placement, and the main differences between DIY and professional installation. Because vehicle layouts vary, always verify your dash cam kit instructions and your vehicle’s trim, windshield design, and electrical setup before you begin.
- Compatibility first: Check windshield sensors, power options, and rear cable length.
- Clean mounting matters: A high, centered position improves visibility and recording quality.
- Hardwiring adds parking mode: Use fuse taps and battery protection carefully.
- Neat routing prevents problems: Keep cables away from airbags and moving parts.
How to Install Premium Dash Cam: What Drivers Actually Want to Know in 2026
Most drivers want a dash cam installation that looks factory-clean, powers on reliably, and does not interfere with airbags, sensors, or driver visibility. A premium dash cam often includes front and rear recording, GPS, Wi-Fi, parking mode, and a hardwire kit, so the install is a little more involved than a basic plug-in camera.
The key is to plan before sticking anything to the windshield. If you choose the wrong mounting point or power method, you can end up with glare, cable clutter, or parking mode that drains the battery too far.
Test the camera on the workbench first so you know it powers up before mounting anything permanently.
A premium dash cam installation is usually straightforward for a front-only setup and still manageable for a front-rear system. Hardwiring adds more steps, but it also gives you cleaner wiring and better parking protection when done correctly.
Premium Dash Cam Compatibility Check: Vehicle Type, Power Source, and Mounting Options
Before installation, confirm that the dash cam matches your vehicle’s layout and your preferred power source. Some vehicles make a 12V socket install very easy, while others are better suited to a hardwire kit or OBD-II power adapter depending on trim and accessory layout.
- Match year, make, model, and trim
- Check power source access and fuse box location
- Compare windshield shape, sensor placement, and camera clearance
12V socket vs hardwire kit vs OBD-II power
A 12V socket is the easiest option because it usually requires no electrical work. It is a good choice if you want quick installation, but it may leave visible wiring and can stop recording when the ignition is off.
A hardwire kit is the cleanest option for many premium dash cam setups. It connects to the fuse box and can support parking mode, but it requires careful fuse selection and safe routing.
An OBD-II power adapter can be convenient because it avoids fuse tapping, but it may not suit every vehicle or every parking mode setup. If you want to compare adapter styles more deeply, the OBD2 adapter comparison guide can help you understand the basics.
Windshield size, sensor placement, and ADAS/camera clearance
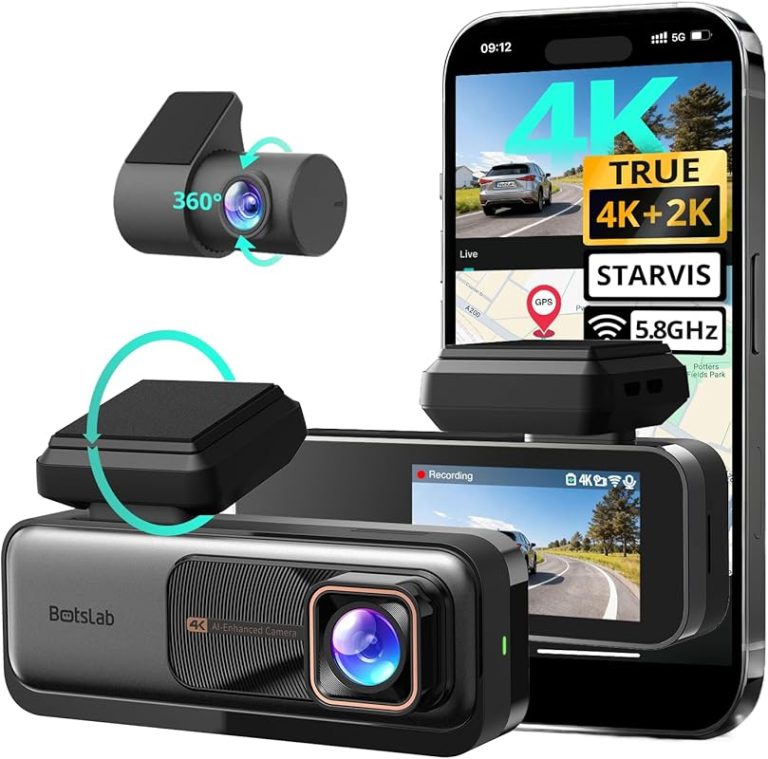
Premium dash cams should sit high and centered, usually behind the rearview mirror where they are less noticeable. That location helps keep the lens out of your direct line of sight while still giving a wide view of the road.
Do not block rain sensors, lane cameras, light sensors, or other ADAS hardware near the mirror area. Some modern vehicles have a small usable zone on the windshield, so the best spot may vary by model and trim.
Windshield tint strips, sensor housings, and mirror brackets can limit where a dash cam can sit safely and legally.
Sedan, SUV, truck, and EV installation differences
Sedans often have the simplest cable routing because the rear camera wire can usually run through the headliner and trunk area. SUVs may need a longer rear cable because of the larger cabin and rear glass position.
Trucks can be trickier because the rear camera may need to cross a longer distance to the back window or canopy. EVs may also require extra care because accessory power management can differ from gas vehicles, especially with parking mode and battery protection settings.
Tools, Parts, and Prep Before You Start the Installation
Good prep makes the job faster, safer, and more professional-looking. Before you touch the headliner or fuse box, lay out every part and confirm the kit includes the right cables for your vehicle.
What comes in a premium dash cam kit
Most premium dash cam kits include the front camera, rear camera, mounting adhesive or bracket, power cable, rear connection cable, and sometimes a hardwire kit. Some also include GPS modules, CPL filters, trim clips, and a memory card, but that varies by brand and package.
Check the manual for any special mounting angle requirements or camera orientation marks. If the kit includes a separate parking mode module, make sure you understand how it integrates before installation begins.
Extra items you may need: trim tools, fuse taps, cable clips, microSD card
Plastic trim tools help tuck cables without damaging panels or scratching the interior. Cable clips can keep the wire from dangling near pedals, the steering wheel, or passenger movement.
If you hardwire the camera, you may need fuse taps, a test light or multimeter, and the correct microSD card for continuous recording. For drivers who also use diagnostic tools, it helps to understand accessory power behavior; our DIY car repair scanner guide explains why power access and vehicle electronics setup matter.
- Plastic pry tool
- MicroSD card rated for dash cam use
- Fuse taps if hardwiring
- Cable clips or adhesive guides
- Small screwdriver if required
Choosing the best camera position for front and rear coverage
The front camera should capture the lane ahead, the hood line, and the road horizon without pointing too far up or down. A small tilt can make a big difference in plate readability and incident evidence.
The rear camera should be centered and high enough to avoid blocking the view with headrests, wipers, or tinted glass bands. Before finalizing the mount, sit in the driver’s seat and check what the camera sees from your normal driving position.
Step-by-Step Premium Dash Cam Installation Guide
The process below works as a general guide for many premium dash cam systems, but your kit may differ slightly. Follow the manufacturer’s instructions for cable direction, adhesive cure time, and parking mode setup.
Step 1: Test the camera and format the memory card
Power the dash cam before mounting it to confirm the screen, buttons, lens, and app connection work. If the camera supports GPS or Wi-Fi, verify those features now so you can troubleshoot before the unit is attached to the glass.
Format the microSD card in the camera or in the recommended device menu. A fresh format helps reduce file errors and improves reliability during loop recording.
Step 2: Clean the windshield and mark the mounting point
Clean the inside of the windshield with a glass-safe cleaner and dry it fully. Any dust, oil, or residue can weaken the adhesive and cause the mount to fall later.
Use painter’s tape or a temporary marker to identify the best position behind the mirror area. Double-check that the camera will not block sensors or interfere with mirror movement.
Step 3: Attach the front camera and route the cable neatly
Stick or mount the front camera firmly according to the kit instructions. Hold pressure for the recommended time so the adhesive bonds properly.
Route the cable upward into the headliner, then along the top edge of the windshield and down the pillar or trim path. Keep the wire tucked securely and away from airbags, moving pedals, and sharp edges.
Never run a cable where it could interfere with curtain airbags, steering components, or the driver’s feet.
Step 4: Install the rear camera and connect the rear cable
Mount the rear camera in the center of the rear glass or rear cabin area, depending on your vehicle and kit design. Make sure the lens points straight back and does not sit behind a defroster line if that affects clarity.
Run the rear cable along the roofline and down through trim panels, keeping the path neat and hidden. Avoid pinching the wire under panels or forcing it around tight bends.
Step 5: Power the unit and verify recording, GPS, and Wi-Fi
Turn the vehicle on and confirm that the dash cam starts recording automatically. Check the live view or playback to make sure the front and rear cameras are aligned correctly.
If your model includes GPS, verify that location data is being captured after a short drive. If it has Wi-Fi, connect the companion app and confirm that video files transfer properly.
Hardwiring a Premium Dash Cam: Fuse Box Setup, Parking Mode, and Safety
Hardwiring is the best choice for many premium dash cam users because it supports parking mode and keeps the cabin cleaner. It does require more care, especially around fuse selection and battery protection settings.
ACC, constant power, and ground wire basics
Most hardwire kits use three connections: ACC, constant power, and ground. ACC tells the camera when the ignition is on, constant power keeps parking mode alive, and ground completes the circuit safely.
If you are not sure which fuse is which, confirm with a vehicle-specific source or a qualified technician. Electrical layouts can vary by model year, trim, and fuse box design.
Fuse tap selection and circuit matching
Choose a fuse tap that matches the fuse size used in your vehicle’s box. Then select circuits carefully so the dash cam is connected to the intended power behavior.
Some drivers choose an ignition-switched circuit for ACC and a constant circuit for parking mode. The wrong choice can cause the camera to stay on too long or shut off when you need parking protection most.
If you also use OBD-based accessories, it helps to understand the difference between basic and premium adapters. Our premium OBD2 adapter overview explains why power behavior and build quality matter.
Parking mode settings and battery protection
Parking mode can be very useful, but it should not drain the vehicle battery excessively. Many hardwire kits include low-voltage cutoff or timer settings to reduce that risk.
Set the protection threshold based on the vehicle and your driving habits, then test the system after a normal park cycle. If your car sits for long periods, battery management becomes even more important.
Programming or modifying vehicle electrical circuits may require professional equipment and careful verification to avoid battery drain or fault codes.
Common Installation Mistakes That Reduce Video Quality or Cause Problems
Even a premium dash cam can underperform if the mount, cable path, or settings are wrong. Most problems are avoidable with a careful final check.
Poor angle, glare, and blocked field of view
If the camera points too high, you may record too much sky and not enough road. If it points too low, you may miss license plates and traffic signals.
Glare from the dashboard or windshield tint can also reduce clarity. A slight adjustment, a CPL filter, or a better mounting point can improve the image a lot.
Loose cables, rattles, and adhesive failure
Loose cables can rattle against trim and become annoying over time. They can also pull on the camera mount if the wire is left hanging.
Adhesive failure usually happens when the glass was not cleaned well or the mount was loaded too soon. Give the adhesive time to bond and avoid extreme temperature stress right after installation.
Overlooking firmware, time settings, and memory card health
Many drivers forget to update firmware or set the correct date and time. That can make footage harder to use if you ever need it as evidence.
Memory cards also wear out, especially in dash cams that record continuously. Replace cards when the manufacturer recommends it, and check for errors if files stop saving properly.
The mount may be loose or the windshield surface may not be clean.
Power may be unstable, or the memory card may be failing.
The hardwire settings, fuse choice, or battery cutoff may need review.
Cost, Time, and DIY vs Professional Installation Comparison
The right choice depends on your comfort level, your vehicle’s electrical layout, and how hidden you want the wiring to be. A front-only install is usually simpler than a full front-rear, hardwired system.
Typical install time for front-only and front-rear systems
A front-only dash cam can often be installed in less than an hour if the power source is simple. A front-rear system usually takes longer because the rear cable needs to be routed through more trim and cabin space.
Hardwiring adds time because you need to access the fuse box, confirm circuits, and test the parking mode settings afterward. The total time may vary by vehicle layout and how much interior trim must be removed.
DIY cost breakdown vs installer pricing
DIY installation can keep costs lower if you already have the tools and the kit includes the cables you need. You may still need extra items such as fuse taps, trim tools, or a higher-end memory card.
Professional pricing also varies by region, vehicle type, and whether the system is front-only or front-rear. Ask what is included before approving the work.
When an auto electrician or shop is worth it
Professional help is worth considering if you want hardwiring, parking mode, or a very clean hidden-wire install. It is also a smart choice if your vehicle has complex interior trim or sensitive electrical systems.
If you are unsure about fuse access, airbag zones, or power management, a qualified installer can reduce the risk of damage. That is especially helpful on newer vehicles where accessory circuits and driver-assist hardware are more integrated.
- Cleaner wiring and better parking mode support
- Less risk of trim damage or poor cable routing
- Higher cost than a simple DIY install
- Dependent on shop quality and vehicle complexity
Final Recap: How to Install Premium Dash Cam the Right Way
The best way to install a premium dash cam is to plan the power source, confirm windshield clearance, and route every cable safely before making anything permanent. A careful setup improves image quality, protects your vehicle’s interior, and makes parking mode more reliable.
If your install involves hardwiring, airbag areas, or complex electrical access, take your time and consider professional help. Done properly, a premium dash cam can look nearly factory-installed and provide dependable coverage every time you drive.
Frequently Asked Questions
Check your power source, windshield clearance, and rear camera cable path first. Also confirm the kit contents, memory card type, and whether parking mode will need hardwiring.
Yes, many cameras can run from a 12V socket for simple plug-and-play use. This is easier, but it may not support parking mode or hidden wiring as well as a hardwire kit.
The camera should sit high and centered, usually behind the mirror, without blocking sensors or your view. Check the live image before finalizing the mount so the horizon and road are framed correctly.
Contact a qualified automotive technician if the install requires fuse box work, airbag-area routing, or complex vehicle electronics access. Professional help is also wise if you are unsure about parking mode power settings or battery protection.
Verify the front and rear camera support, power method, included cables, and whether the kit matches your vehicle layout. Also check return policy, warranty terms, and seller reputation before purchase.
It can if cables are routed poorly or power circuits are matched incorrectly. Keep wiring away from airbags and use the correct fuse or adapter method to avoid electrical or security issues.