
Portable Tire Inflator: How to Use It in 5 Easy Steps

Low tire pressure can ruin a trip and wear tires quickly. If you want to learn how to use a portable tire inflator, this guide walks you through safe, practical steps that match real-world situations.
Manufacturer specifications indicate most consumer inflators reach up to 150 PSI and have duty cycles like 10 to 15 minutes run time. As of 2026, aggregate reviews and NHTSA guidance stress checking cold tire pressure monthly before driving, so start with cold readings and follow the steps below.
Quick Answer
How to use a portable tire inflator, fast and safe.
Check cold tire pressures first.
Attach the correct chuck and set target PSI.
Inflate slowly, verify gauge, then re-check after a short drive.
Problem / pain points you’ll face with portable inflators (inaccurate gauges, duty cycle, valve types)
Tire inflation sounds simple, but there are traps that cost time and safety. Common issues are inaccurate built-in gauges, overheating motors from exceeding duty cycles, and wrong adapters for Presta or Schrader valves. A weak battery or a blown 12V fuse can leave you stranded with a tire still low.
Aggregate user feedback and manufacturer specifications confirm typical 12V inflators draw 10 to 20 amps, so a blown fuse is a real risk.
Here are the most frequent pain points and what they mean for you.
- Inaccurate gauge readings, the symptom: pressure differs from a handheld gauge by 2 to 5 PSI.
- Duty cycle limits, the symptom: unit overheats after 10 to 15 minutes of continuous use.
- Wrong valve type, the symptom: poor seal, slow fill, or air leak.
- Electrical issues, the symptom: cigarette outlet fuse blows or battery dies.
- High-volume tires, the symptom: long inflation times that drain batteries and overheat motors.
When you plan, think through these variables. If you must inflate an RV, trailer, or large truck tire, a small retail inflator may be too slow. For passenger cars and bicycles, most compact inflators are fine.
If you want guidance on choosing capacity and accessories, see the included accessories list for inflators.
For safety context, the National Highway Traffic Safety Administration offers general tire maintenance guidance at NHTSA. For federal transportation and equipment rules, visit U.S. Department of Transportation.
How a portable tire inflator works and what affects performance (motor, flow rate, pressure range, duty cycle)
A portable tire inflator is a small compressor that forces air into a tire through the valve stem. Core parts are the motor, pump head, pressure gauge, hose, and chuck. Performance hinges on three measurable things, motor power, flow rate, and the device duty cycle.
Motor power is often described in watts or amps. Flow rate is shown as liters per minute or cubic feet per minute, and duty cycle tells you how long you can run the unit before it needs to cool.
What those metrics mean for practical use
- Motor power, higher wattage moves more air and inflates faster for large-volume tires.
- Flow rate, measured in L/min or CFM, correlates directly to inflation speed.
- Maximum PSI, you must pick inflators rated above your tire placard PSI. Many units are 0 to 150 PSI.
- Duty cycle, typical consumer models run 10 to 15 minutes and then need a 15 to 30 minute cool-down.
If you have multiple tires to inflate after airing down for off-road use, you need a unit with a higher flow rate and longer duty cycle. For bikes, a tiny cordless unit is often enough. For RVs or trailers, a compressor with higher flow, or a shop compressor with a tank, saves time.
Compare those trade-offs when making a plan.
Features & components to check before you buy or use (max PSI, gauge accuracy, chuck type, power source, battery specs)
Before use, confirm the inflator matches your needs. Check these features and parts to avoid common mismatches.
- Maximum PSI rating, choose at least the tire placard PSI.
- Gauge accuracy, look for accuracy within ±1 to ±3 PSI.
- Chuck type, clip-on, screw-on, or lever-lock matters for a reliable seal.
- Power source, options include 12V vehicle plug, built-in Li-ion battery, or AC.
- Battery capacity and voltage, note mAh and voltage for cordless models.
- Inflation presets and auto-stop, useful for setting target PSI.
- Hose length and flexibility, longer hoses reach all tires without moving the car.
- Duty cycle rating, follow manufacturer cool-down recommendations.
- Safety features, thermal cutoff, overload protection, and inline fuses.
Tools and materials checklist
| Item | Why it matters | Typical spec |
|---|---|---|
| Pressure gauge | Verify pressure independent of inflator | ±1–3 PSI accuracy |
| Valve adapters | Presta, sports-needle for balls | Brass or steel |
| 12V inline fuse | Protect vehicle circuit | 10–20 A, match device rating |
| Tire pressure sticker | Vehicle target PSI reference | Found on door jamb |
| Portable inflator | The unit itself | 0–150 PSI, 10–200 W motor |
If you want a quick rundown of included parts with common inflators, check the included accessories list, which explains common extras like adapters and carry cases. For advice on matching an inflator to a passenger car, see selecting the right inflator.
Practical notes on power sources
- 12V plug models offer continuous power, limited by vehicle outlet fuse ratings. Avoid plugging multiple high-draw devices into the same circuit.
- Cordless Li-ion models are portable but limited by battery capacity. Check the listed mAh and the estimated inflation times in manufacturer specs.
- AC models are best at home if you have a garage outlet and need longer run times.
If you plan to work on TPMS equipped wheels, pairing an inflator with a TPMS reset tool makes life easier. For that, see TPMS reset tools. If you do more DIY vehicle work at home, adding a home OBD2 tool can round out your toolkit, such as home mechanic OBD2 tools.
Step-by-step process: prepare, attach, inflate, and verify
Pre-check, before touching the inflator
- Check the tire placard or owner’s manual for target cold PSI. The tire placard is usually on the driver door jamb.
- Measure tires cold. Cold means parked for three hours or driven less than one mile. Aggregate reviews and advice indicate cold readings are the baseline for correct inflation.
- Inspect the tire for cuts, bulges, and the valve stem condition. If the valve core is damaged, replace it before inflating.
- Confirm the inflator’s max PSI exceeds the tire placard value.
Attach and power the inflator
- Remove the valve cap and set it aside. Inspect the valve core for corrosion.
- If you have a Presta valve, use a Presta-to-Schrader adapter or the inflator’s specific Presta chuck. If the unit does not include one, use a threaded adapter.
- Attach the inflator chuck to the valve stem. For a clip-on chuck, press it straight and clamp to seat the seal. For screw-on chucks, thread clockwise until snug.
- Connect power. For a 12V model, plug into the vehicle socket with the engine running if you expect long inflation times. Running the engine helps keep the battery charged. For cordless models, confirm battery is charged.
Set target pressure and inflate
- Select the unit’s PSI units, PSI is standard for U.S. vehicles.
- If the inflator offers a preset auto-stop, program the target PSI from the tire placard. If not, plan to stop and check regularly.
- Begin inflating. Watch the displayed pressure and listen for leaks at the chuck. Fill in short bursts on large tires to prevent motor overheating.
- If the device has a duty cycle, watch run time. Stop and allow the unit to cool as the manufacturer recommends, often 10 to 15 minutes run time then 15 to 30 minutes off.
Verify and finish
- Remove the chuck quickly but carefully. Immediately use a reliable handheld gauge to verify pressure. Inflator gauges can be off by a couple PSI.
- Replace valve caps. Record PSI if you track maintenance.
- After inflating a significantly underinflated tire, drive 5 to 10 miles and re-check pressure. Heat from driving can change readings and reveal leaks.
- If TPMS warnings appear, follow the vehicle’s TPMS reset procedure or scan tool instructions from a TPMS reset tool reference. For TPMS relearn and scan tools that help, see TPMS reset tools.
Quick troubleshooting during the process
- If the chuck leaks, reposition and re-seat the seal. Sometimes cleaning the valve stem helps.
- If the inflator stops unexpectedly, check the inline fuse on the 12V plug. Replace with the correct amp rating.
- If the motor is hot, pause and let the unit cool. Overheating damages internal components.
- If pressure climbs slowly, the unit may lack adequate flow for that tire volume. Consider a shop compressor for heavy-duty needs.
Troubleshooting visual aid and image
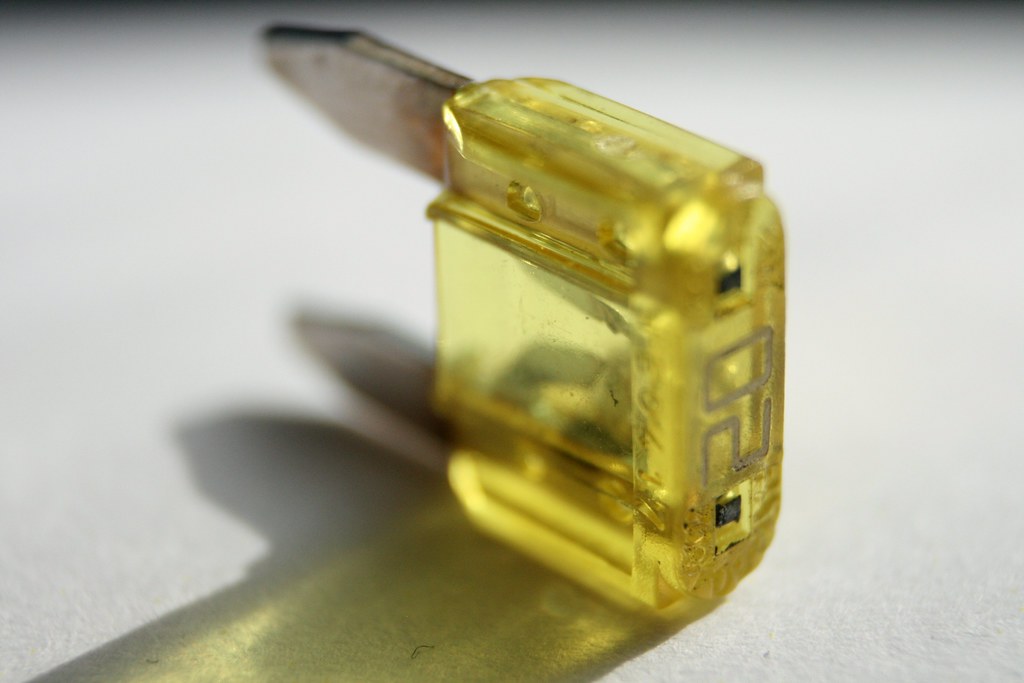
Image source: Openverse / comedy_nose (PDM 1.0)
This image shows a pulled 12V cigarette-lighter inline fuse with visible damage. If your inflator stops and the fuse looks like this, replace it with the correct amp rating noted by the inflator manufacturer.
Internal links to other helpful guides
- For quick reference on what comes with typical inflators, see the included accessories list.
- For guidance on choosing the right unit, consult selecting the right inflator.
- For dashboard wiring tips that apply when using a 12V outlet with other devices, read dashboard wiring tips.
- For TPMS relearn devices and scanners that assist after inflation, review TPMS reset tools.
- For home workshop scanner choices that pair well with inflator maintenance, see home mechanic OBD2 tools.
Decision guide: which inflator and action to choose for your situation
If you need a quick roadside top-up for a passenger car, choose a 12V inflator with a decent flow rate and an auto-stop. These units plug into your vehicle and keep the battery healthy if you run the engine. If you expect repeated uses or long trips, pick a model with a longer duty cycle or a built-in battery of at least 4000 mAh.
For RVs, trailers, or large trucks, choose a compressor with high L/min or a shop compressor with a tank, because tire volume matters more than peak PSI. If you work on bikes and e-bikes, get a Presta-compatible inflator or a small hand pump that reads accurately. For off-road recovery after airing down, a high-flow portable compressor with a fast recovery time is best.
Quick decision tree
- If tire is slightly low and you’re roadside, then use 12V inflator with engine on.
- If tire is flat with bead unseated, then you need a compressor with higher flow, or professional assistance.
- If you have multiple tires to refill, then pick a unit with long duty cycle or an AC model.
For help matching specs to vehicle needs, pick the right unit for your car by checking a dedicated buying guide.
Comparisons & alternatives: 12V vs cordless Li-ion vs AC vs CO2 vs shop compressor
Here’s a compact comparison to choose what fits your routine.
| Type | Best for | Pros | Cons |
|---|---|---|---|
| 12V inflator | Roadside passenger car tops | Continuous power when engine runs, portable | Can blow vehicle fuse, limited by vehicle outlet |
| Cordless Li-ion | Remote use, cyclists, quick top-ups | Portable, no vehicle dependency | Battery limits, slower on large tires |
| AC inflator | Home garage maintenance | Longer run times, reliable | Not portable without inverter |
| CO2 cartridge | Rapid emergency seating for bead or tubeless | Fast, compact | Single use, expensive over time |
| Shop compressor | Multiple heavy uses, RVs | Fast refill, high volume | Expensive, not portable |
Who each option suits
- 12V inflators are best for everyday drivers who need occasional top-ups.
- Cordless models suit cyclists, commuters, and emergencies away from a car.
- AC compressors make sense if you have a home garage and inflate often.
- CO2 cartridges are for emergency trail fixes when speed matters.
- Shop compressors or tank-equipped units serve pros, RVers, and fleets.
If you plan to hardwire an inflator into a vehicle or run devices from the dash, review dashboard wiring tips to avoid electrical surprises.
Mistakes to avoid and common troubleshooting (overinflation, hot-tire readings, blown fuses, poor seals)
Don’t treat a hot tire reading as true tire pressure. Always check cold pressure first, because a tire heats and reads higher after driving. If you inflate to a hot reading, you’ll overinflate when the tire cools.
If the inflator stops suddenly, check the inline fuse on the 12V plug and the vehicle fuse box. Replace fuses only with the amp rating specified by the manufacturer. The most common failure is a blown 10 to 20 amp fuse from exceeding the outlet rating or using the wrong replacement.
Common problems and fixes
- Inflator gauge reads high or low, fix: verify with a trusted handheld gauge and adjust.
- Chuck leaks at valve, fix: re-seat chuck, use a screw-on adapter, replace worn chuck.
- Slow inflation on large tires, fix: use a higher-flow unit or shop compressor.
- Bead won’t seat on a flat tire, fix: use a larger compressor or professional bead seating tool.
If you need to confirm what accessories are included with a new inflator, check the contents and adapters list before attempting repairs. Visual cues help identify faults, for example a scorched fuse looks like the image previously shown, and a cracked valve stem will leak steadily when soaped.
Safety, legal, and compliance notes (DOT limits, TPMS care, electrical fuse ratings, certifications)
Follow the tire placard PSI and never exceed the tire’s maximum pressure stamped on the sidewall. DOT and tire manufacturers set those limits for safe operation. If you inflate beyond the maximum, the tire can rupture under load.
When working with TPMS equipped wheels, avoid loosening or removing valve cores without knowing the relearn procedure. Damaging a TPMS sensor or valve stem can trigger warning lights and require a sensor replacement. For TPMS relearn steps and compatible scanners, see TPMS scanner options.
Electrical safety rules
- Match the 12V plug fuse to the inflator rating. Using a higher amp fuse risks wiring damage.
- Run the engine during extended inflation to avoid discharging the vehicle battery.
- Look for UL or CE markings on the product for electrical conformity and safer operation.
Certifications mean the unit met baseline electrical and EMC testing, but they do not replace correct operation and duty cycle adherence. For regulatory advice on tire safety and maintenance, consult NHTSA guidance.
Maintenance & long-term care (battery charging, hose/chuck inspection, storage, firmware/manual updates)
Routine upkeep extends the life of an inflator. Charge cordless batteries after use, and avoid storing batteries at full charge in hot environments. Manufacturer specs often recommend storing Li-ion batteries at around 40 to 60 percent charge for long-term storage.
Weekly or monthly checks
- Inspect hose and chuck for cracks or hardened rubber, replace if damaged.
- Test gauge accuracy against a handheld reference gauge, recalibrate or replace if off by more than 2 PSI.
- Clean air intakes and filters, keep the motor vents clear of debris.
Valve and accessory care
- Replace valve cores with a valve core tool when corroded. A corroded core leaks slowly and reduces holding pressure.
- Keep adapters, needle nozzles, and seals in a small parts box to avoid loss. Check the accessories checklist to confirm included parts.
For garage tool integration and diagnostic pairing, consider adding dependable home diagnostic tools to your kit. Good maintenance and periodic checks reduce roadside failures and prolong the inflator’s effective life.
Costs, specs, and performance data to expect
Expect three clear price bands and predictable specs in each.
| Price band | Typical specs | Best for |
|---|---|---|
| Budget ($20–50) | 0–100 PSI, low flow, 10 A draw | Occasional top-ups |
| Mid-range ($50–120) | 0–150 PSI, 10–20 A draw, 2–5 L/min | Regular drivers |
| Premium ($120+) | High flow, long duty cycle, 18–20 V battery | RVs, fleets |
Typical numbers to watch are max PSI (most consumer units go to 150 PSI), flow rate in L/min, motor power in watts, and duty cycle listed in minutes on time. For help matching a unit to the vehicle’s needs, see matching unit to vehicle.
Expert tips & pro tricks
Keep pressure checks cold for repeatable readings. A cold check means the car has been parked three hours or driven less than one mile. If you drive first, your reading will be higher and misleading.
Small practical tricks
- Use the inflator’s auto-stop for routine fills to avoid overpressure.
- Test the inflator gauge against a handheld gauge before relying on it.
- Stow a small valve-core tool and Presta adapter in the kit. For common parts and adapters, see the parts and adapters list.
If you plan electrical add-ons in the car, follow dash wiring basics so you don’t overload the cigarette outlet.
Real scenarios and short case examples
Scenario 1, roadside top-up for a passenger car. You find a tire at 28 PSI, tire placard calls for 35 PSI, inflator pumps to 35 PSI in about 3 to 6 minutes on most mid-range units. Drive five to ten miles, then re-check to confirm no slow leak.
Scenario 2, airing down and re-inflating an off-road 4×4. You’ll need high flow and repeated fills, so a compressor with longer duty cycle or tank will refill faster and avoid overheating. For long wiring runs or hardwiring, consult dash wiring basics for safe installation.
Frequently Asked Questions
How do I find the right PSI for my tires?
Check the vehicle tire placard on the driver door jamb, not the sidewall. The placard gives the manufacturer’s recommended cold PSI for front and rear tires. Use that number for your preset target.
How long does filling a tire usually take?
Filling from 25 to 35 PSI on a passenger car tire typically takes 2 to 7 minutes depending on inflator flow. Larger tires take longer. Manufacturer specs list L/min or CFM for accurate expectations.
Can I use a portable inflator with TPMS sensors?
Yes, if you don’t damage the valve stem or sensor. Avoid removing sensors and follow the vehicle’s TPMS relearn procedure if a warning light appears. For compatible tools and readers, check TPMS scanner options.
Why did my inflator stop working mid-use?
Common causes are motor thermal cutout or a blown 12V fuse. Let the unit cool per manufacturer duty cycle instructions and check the inline fuse in the plug and vehicle fuse box. Replace fuses with the correct amp rating.
Final decision checklist: pick, use, and store a portable inflator confidently
- Confirm tire placard PSI and write it down.
- Check inflator max PSI, flow rate, and duty cycle before use.
- Bring valve adapters, a handheld gauge, and a valve-core tool.
- Run the engine for long 12V inflations, and watch the fuse rating.
- Verify pressure cold, then drive short distance and re-check.
- Store batteries partly charged and protect the hose from kinks.
- Add a compact TPMS-capable scanner to your kit for diagnostics, see home diagnostic tools for options.
