
How to Use a Tire Inflator: Step-by-Step

If you need to know how to use a tire inflator, start with a clear goal: measure cold pressure, attach the chuck, and inflate to the vehicle placard PSI. Tires change pressure with temperature and load, so simple steps keep you safe and save money.
Manufacturer specifications indicate many portable inflators have duty cycles of 10 to 15 minutes and flow rates from about 20 to 35 L/min, as of 2026. Aggregate guidance from regulators and makers agrees, check cold pressure before inflating, and avoid exceeding the tire sidewall maximum. Below are clear steps, decisions, and safety checks to follow now.
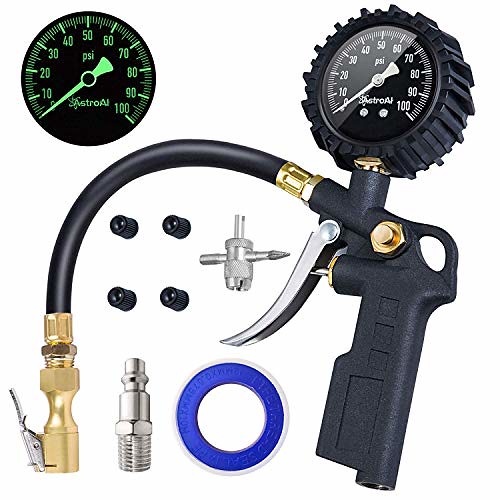
Quick Answer
How to use a tire inflator: check cold pressure, attach, inflate to PSI.
Measure pressure with a reliable gauge before and after inflating.
Follow vehicle placard PSI, not the tire sidewall maximum.
Manufacturer specs and NHTSA guidance help with safe practices.
Problem / pain points drivers face with tire inflation
Flat or low tires can appear suddenly, and many drivers miss the early signs.
Slow leaks cause uneven wear and worse fuel economy over weeks.
TPMS alerts may confuse people after a temporary repair or pressure change.
Common user frustrations include confusing the tire sidewall max PSI with the vehicle placard recommendation. Many manuals list the placard PSI on the door jamb or glove box. If you inflate to the sidewall max, you will overpressurize the tire for normal driving.
For authoritative safety basics, see NHTSA guidance.
Other pain points that require practical answers are these items:
- Inaccurate gauges, leading to repeated adjustments.
- Inflator overheating when used beyond the duty cycle.
- Draining a car battery with the engine off while running a 12V inflator.
- Difficulty sealing the chuck to a worn valve stem, causing air loss.
If you get repeated TPMS warnings after inflating, follow procedures to clear or verify the sensor. For electronic reset options and scanning, consult resources on how to perform a proper TPMS reset with a compatible scanner, for instance using a reliable reset TPMS workflow.
Core explanation: How a tire inflator works and what matters
A tire inflator is a small air compressor that forces air into a tire via the valve stem.
It converts electrical energy from 12V DC, 120V AC, or an internal battery into compressed air.
The inflator pushes a continuous airflow, measured in liters per minute or cubic feet per minute.
Key physics and terms explained in plain language
- PSI, BAR, kPa, pressure units used on gauges and placards. Most U.S. cars use PSI.
- Flow rate, how fast the inflator moves air into the tire. More flow, faster fill.
- Duty cycle, the safe run time to avoid overheating. Typical portables have 10 to 15 minute duty cycles. Manufacturer specifications indicate this is standard for many consumer models.
- Valve types, Schrader for cars and many bikes, Presta for many road bikes. Use an adapter for Presta.
Why cold pressure matters
- Tire pressure rises as the tire heats during driving, roughly 1 PSI per 10 degrees Fahrenheit.
- Measure "cold" pressure, which means before driving or after 3 or more hours parked. This gives repeatable, accurate readings.
How TPMS and inflators interact
- Tire Pressure Monitoring System sensors measure individual tire pressure and warn if pressure is low.
- Inflating a tire changes TPMS readings and may clear a warning after driving a short distance. If the light stays on, you may need a scan tool or manual reset. See the note on compatible tools in the Features section and the guide to a home diagnostic scanner for DIY checks.
Practical numbers to memorize
- Typical passenger tire target: about 30 to 35 PSI, check your placard.
- Sidewall maximum may read 44 PSI or higher, do not use that as your driving target.
- Pressure variation: around 1 PSI change per 10°F ambient change, plan checks in cold weather.
For broader vehicle safety recommendations, the U.S. Department of Transportation provides resources on tire care at transportation.gov.
Features & components to check before buying or using
When you open an inflator or borrow one, confirm these core features. Each item affects safety, usability, or the success of an inflation.
- Pressure range, for example 0 to 100 PSI or 0 to 150 PSI.
- Gauge accuracy, ideally ±1 to ±2 PSI for a good digital unit.
- Flow rate, measured in L/min or CFM. Higher flow fills faster.
- Duty cycle, for example 10 to 15 minutes on then cool down.
- Power source, 12V DC, 120V AC, or battery (Ah or Wh rating).
- Chuck type, clip-on or screw-on, and presence of a Presta adapter.
- Auto shut-off feature, to stop at a preset PSI.
- Included accessories and storage for cables.
Tools and materials table
| Item | Typical spec | Why it matters |
|---|---|---|
| Pressure range | 0–100 PSI | Must cover your vehicle placard value |
| Flow rate | 20–35 L/min | Faster fill time for passenger tires |
| Duty cycle | 10–15 minutes | Prevents motor overheating |
| Power source | 12V DC / battery / 120V AC | Matches where you will use it |
Accessories that often come with inflators include a screw-on inflation chuck, a clip-on head, Presta adapter, extra valve cores, and a fuse. If you want an itemized list, check included accessories for your model with notes about storage in the unit. For a simple inventory of what to expect, consult the guide on included included accessories.
Quick checklist before you start
- Read the owner’s manual for the inflator and your vehicle.
- Confirm your target PSI from the vehicle placard.
- Check the inflator fuse if it uses a 12V cigarette plug.
- Inspect the valve stems and caps for damage.
- If you have a TPMS capable vehicle, have a compatible scan tool or reset procedure ready. For basic scanning needs, a useful resource is a trusted beginner scan tool walkthrough.
Decision tree: Which inflator and method to use
If you need an inflator now, choose the type by answering three quick questions. Pick one path, then follow the matching action.
Question 1, where will you use it most, roadside or garage?
- If roadside, then 12V DC inflator or CO2 cartridge is best for portability. Go to Question 2.
- If at home, then a 120V AC inflator or garage compressor is best. Go to Question 3.
Question 2, do you need multiple top-ups or fast fills?
- If yes, choose a battery or 12V unit with higher flow and a longer duty cycle.
- If no and this is an emergency, CO2 cartridges give a fast short boost but only one or two fills.
Question 3, do you want speed and repeated use?
- If yes, a shop compressor or 120V inflator with high CFM is best.
- If no, a compact home inflator suffices for occasional top-ups.
Which option is best for common users
- 12V DC inflator, best for commuters and drivers who want roadside convenience. It plugs into the cigarette socket and handles most passenger tires. Be careful not to run it long with the engine off or you may drain the battery. For battery drain avoidance tips and using the correct fuse, consult your manual first.
- Cordless battery inflator, best for people who value portability and independence from the vehicle battery. Choose one with enough mAh for multiple fills.
- 120V AC inflator or garage compressor, best for home mechanics who perform regular maintenance. Higher flow and durability matter.
- CO2 cartridge inflator, best for emergency quick top-ups for one tire, commonly used by cyclists and some motorists. Keep in mind cartridges give limited volume.
- Manual pump, best as a backup for bicycles or occasional use where power is unavailable.
Quick comparison table
| Type | Power | Best use | Limitations |
|---|---|---|---|
| 12V DC | Vehicle socket | Roadside top-ups | Battery drain risk |
| Cordless battery | Battery pack | Portable repeated use | Charge required |
| 120V AC | Home power | Fast fills, frequent use | Not portable |
| CO2 cartridge | Compressed gas | Emergency, quick boost | Limited air volume |
| Manual pump | Human power | Bikes, rare use | Slow, tiring |
Choosing the right unit for your car often means balancing portability and flow rate. For detailed buying guidance that focuses on car use rather than features alone, see our notes on choosing the right unit.
Decision flags that require a professional
- If the tire shows sidewall or bead damage, do not inflate for road use, have it inspected.
- If a plugged repair keeps losing air, schedule a shop repair. DOT rules require certain repairs be done professionally for a permanent fix.
- If TPMS sensors show faults after inflation, consult a professional or a compatible scan tool. For help picking tools to read TPMS data, review a home resource on the home diagnostic scanner.
Quick decision flow for on-road emergency vs at-home top-up vs pre-trip full inspection
If you have a flat or losing air on the road, stop in a safe spot, turn on hazards, and assess the tire.
If the tire has visible damage, bulge, or the bead is separated, do not inflate, call roadside assistance.
If the tire looks intact, use a 12V inflator or CO2 cartridge for a quick top-up, then drive slowly to a repair shop.
For at-home top-ups, park on level ground, measure cold pressure, and use a 120V or cordless inflator for accuracy.
If you plan a longer trip, do a full pre-trip inspection, check all four tires cold, and inflate to the placard PSI.
A full inspection is the time to check tread depth, valve stems, and the spare, plus verify TPMS readiness.
Decision table, one-line actions
| Situation | Action | Follow-up |
|---|---|---|
| Roadside flat, visible damage | Do not inflate | Tow to shop |
| Roadside slow leak, intact tire | Quick 12V or CO2 top-up | Drive slowly to repair |
| At-home top-up | Inflate with AC or battery unit | Recheck cold PSI next day |
| Pre-trip inspection | Check all tires cold | Inflate, inspect spare, verify TPMS |
If you use a 12V inflator on the road, keep the engine running to avoid draining the battery. If the inflator has a duty cycle, work in short bursts so the motor can cool between runs.
Step-by-step workflow: From pre-check to finished PSI
Pre-checks: what to confirm before you touch the valve
Confirm the correct target PSI from the vehicle placard on the driver door jamb or glove box.
Measure cold pressure, meaning the car has been parked for at least three hours.
Scan visually for cuts, bulges, nails, and check the spare tire too.
Setup: power, fuses, hose and valve-core checks
Confirm the inflator power source and that any inline fuse is intact, match the inflator rating.
If using 12V power, many inflators draw high current, so keep the engine running to protect the battery.
Inspect the hose and chuck, and have a valve-core tool or spare valve cores handy if the core is leaking.
Attaching and inflating: step-by-step
- Remove the valve cap and clean around the stem.
- Press the chuck firmly onto the Schrader valve. For screw-on chucks, thread them until snug.
- If your inflator has a preset PSI or auto shutoff, set it to the placard value. If not, watch the gauge and stop at target.
- Inflate in short bursts, 20 to 45 seconds at a time, then recheck pressure with a reliable gauge.
- Replace the valve cap and record the pressure on a note or phone.
Practical timing and duty cycle notes
- Small passenger tires often reach target PSI in 1 to 3 minutes with a decent inflator.
- If the inflator gets hot or the motor strains, pause for the recommended cool-down stated by the manufacturer.
- If a 12V inflator drops voltage or the vehicle struggles, stop and restart the engine before continuing.
Verifying and finishing
Recheck pressure after 5 minutes to catch slow leaks or gauge drift.
Drive a short distance and recheck again cold if possible.
If TPMS warnings persist, use a scan tool or follow the vehicle reset procedure. For basic options, consider beginner scan tools that support TPMS reading and reset functions, which can save time.
Table: Quick PSI check routine
| Step | When | Purpose |
|---|---|---|
| Initial cold read | Before driving | Baseline pressure |
| After inflation | Immediately | Confirm target reached |
| Recheck after 5 minutes | Short pause | Detect slow leaks |
| Recheck after short drive | Post-drive, cold if possible | Confirm stable pressure |
Troubleshooting & repair workflow (slow leak, bad valve, sealant, plug, when to go to a tire shop)
How do you find a slow leak, and what should you do first
Start with a visual inspection, then use a soapy-water spray around the valve, bead, and tread. Bubbles reveal escaping air.
Listen for a hissing sound near the valve or along the tread. If you find a leak at the valve core, use a valve-core tool to tighten or replace the core.
Steps to diagnose common leak sources
- Valve core leak: tighten or replace core, then re-inflate and monitor.
- Valve stem damage: replace the stem at a shop if it is cracked or bent.
- Puncture in tread: locate with soapy water, then decide on temporary vs permanent repair.
- Bead leak or sidewall damage: do not attempt long-distance driving, seek professional inspection.
Temporary fixes, what works and what to avoid
Sealant and plugs can stop many small tread punctures and let you reach a repair shop safely. They are temporary fixes.
Apply sealant per product instructions and then inflate to placard PSI. Drive carefully and visit a tire shop promptly for a permanent repair.
Avoid using plugs in or near the sidewall, as plugs should not be used there for safety reasons.
Important cautions about sealant and TPMS
- Sealants can contaminate TPMS sensors and complicate repairs. If you use sealant, tell the tire shop.
- Temporary fixes may be allowed for short trips, but a patch-and-plug done from inside is typically the permanent repair recommended by professionals. DOT guidance and manufacturer recommendations vary, so follow shop advice.
When to replace the tire or seek professional help
Replace the tire if the sidewall is cut, the bead is damaged, or the puncture is too large for a plug or patch.
If leaks persist after temporary repairs, schedule a professional inspection. For commercial or heavy-duty tires, federal rules may require certified repair methods.
If you need help reading sensor codes or verifying TPMS after a repair, use a compatible OBD2 scanner. For options suitable for newcomers, search for beginner scan tools that support TPMS and ABS diagnostics.
Common mistakes to avoid
Measure tires cold, do not check immediately after driving. Hot tires read higher.
Do not inflate to the tire sidewall maximum; use the vehicle placard PSI.
Avoid running a 12V inflator for long with the engine off, the battery may drain.
More errors that cause repeat trips or risk
- Relying on an old, uncalibrated gauge. Replace or check against a reliable unit.
- Failing to inspect the valve stem and cap, which can cause slow leaks.
- Ignoring duty cycle limits, which leads to motor damage and unreliable inflation.
- Using plugs in the sidewall area, which is unsafe and often rejected by repair shops.
If a TPMS light stays on after inflation, check the sensor and consider a scan tool. Persistent warnings can signal a faulty sensor, not just low pressure.
Safety, legal, and compliance checkpoints
Follow the vehicle placard PSI and never exceed the tire's load and inflation limits. Manufacturer specs and the DOT set safe repair and replacement standards.
Do not stand directly over a tire while inflating a damaged tire. Move to the side and use a distance while inflating slowly.
Electrical and cartridge safety
- For 12V inflators, use the correct fuse and the recommended power outlet. Manufacturer specs confirm specific fuse sizes, so match them.
- Dispose of CO2 cartridges per local rules. Do not reuse single-use cartridges.
- If a unit sparks, smells like burning, or the wiring is hot, stop and allow it to cool before checking fuses.
Legal and shop compliance
- Have permanent repairs done by a qualified shop for large punctures, sidewall damage, or bead problems.
- Keep a record of repairs and note if sealant was used, since TPMS sensors may need cleaning or replacement.
- For DIY mechanics performing diagnostics, a proper OBD2 scanner helps verify TPMS and ABS-related warnings. For straightforward, entry-level options, look into beginner scan tools to match your needs.
If you follow these safety checks, you reduce the chance of a roadside failure and extend tire life through correct pressure management.
Costs, specs, and performance metrics to compare
Expect basic portable inflators to cost $20 to $60, mid-range $60 to $150, and premium battery models above $150.
Compare flow rate, duty cycle, and gauge accuracy when choosing; these specs determine how fast and reliably a unit fills tires.
Quick comparison table
| Budget band | Typical flow (L/min) | Duty cycle | Typical use |
|---|---|---|---|
| $20–$60 | 20–30 | 5–15 minutes | Occasional roadside top-ups |
| $60–$150 | 25–40 | 10–20 minutes | Regular home and travel use |
| $150+ | 35+ | Longer runs, better cooling | Frequent topping, multiple fills |
Manufacturer specifications confirm flow and duty cycle vary widely, so match specs to expected use rather than price alone.
Maintenance & long-term optimization
Keep the hose and chuck clean, remove dirt and corrosion from valve stems, and replace worn valve cores.
Calibrate or cross-check your inflator gauge against a known accurate gauge yearly, per manufacturer guidance.
Other maintenance tips
- Replace inline fuses and battery packs as recommended.
- Store the inflator in a dry place away from extreme heat.
- Run occasional short bursts to keep motor bearings moving if the unit sits unused for months.
Expert tips & fast checks for real-world use
Set the target PSI from the vehicle placard, not the tire sidewall. That single habit avoids most overinflation errors.
If using a 12V unit roadside, start the engine to prevent battery drain, and inflate in 20 to 45 second bursts to respect duty cycle.
Fast-check list
- Carry a small valve-core tool and a Presta adapter for bikes.
- If TPMS warns after a repair, use simple scan tools to read sensor status and confirm reset, they save time and trips.
- For emergency boosts, CO2 works fast, but follow up with a full inflate from an electric unit.
Use cases: who needs what
Commuters benefit from a compact 12V inflator for quick roadside top-ups and TPMS-ready checks.
Frequent travelers and road-trippers should add a cordless battery inflator or a higher-flow 12V unit for repeated fills.
Fleet managers and home mechanics prefer 120V inflators or garage compressors with higher CFM for speed and durability.
Other scenarios
- RV owners need high-flow units and regular spare checks because heavier tires require more air.
- Motorcyclists and cyclists rely on small high-pressure pumps or CO2 for speed and portability.
- Overlanders want durable battery models and dedicated tire-repair kits stored with the inflator.
Frequently Asked Questions
How do I know the correct PSI for my car tires?
Check the vehicle placard on the driver door jamb or the owner’s manual, those list the recommended cold PSI for front and rear tires. Use that number for inflation, not the maximum PSI stamped on the tire sidewall.
Can I use a 12V inflator with the engine off?
Yes for short fills, but it can drain the battery if the inflator draws high current. Our research and manufacturer specs recommend running the engine for longer fills to protect the vehicle battery.
What should I carry in a roadside tire kit?
Carry a portable inflator, a digital tire pressure gauge, a valve-core tool, a plug kit, and a small bottle of approved sealant. Add a flashlight and gloves for safety, and record your tire pressures after each stop.
How often should I check and calibrate my inflator gauge?
Check your gauge against a trusted reference at least once per year, or sooner if it gets dropped or shows inconsistent readings. Accurate reading within ±1 to ±2 PSI keeps inflation reliable.
Final decision guide: quick checklist to pick the right inflator and workflow
Choose by use case, not by price. If you mostly need roadside help, prioritize a 12V DC unit with at least 25 L/min flow and a clear gauge. If you do regular home maintenance, pick a 120V or cordless model with higher flow and a longer duty cycle.
For emergency one-off boosts, keep a CO2 cartridge as a backup.
Quick checklist to follow now
- Confirm target PSI from the vehicle placard.
- Match inflator power to where you'll use it most.
- Verify duty cycle and flow rate in specs before relying on a model.
- Keep a reliable digital gauge, valve-core tool, and a plug kit together.
For guidance on selecting features, see the detailed buying guidance on selecting the right model.
Real scenarios and short examples
Commuter scenario, short top-up: a compact 12V inflator typically adds 5 PSI to a passenger tire in about two minutes, with the engine running. Use short bursts to respect duty cycle and prevent battery drain.
Road-trip scenario, full set: a cordless inflator with higher flow can refill all four tires in 10 to 20 minutes, depending on initial pressures and load. RV owners should seek units with higher flow and beefier battery capacity.
Benefits and drawbacks, at a glance
Benefits: immediate roadside inflation, better fuel economy, longer tire life, and fewer service visits.
Drawbacks: limited run time on compact units, potential battery drain for 12V models, and sealant use may complicate TPMS.
List of pros and cons
- Pro, convenience and cost savings over repeated service station visits.
- Con, small inflators often have noisy motors and limited duty cycles.
- Pro, many units include lights and storage to help roadside repairs.
- Con, CO2 cartridges offer speed but limited volume and higher cost per fill.
Maintenance and storage checklist
Store the inflator dry, away from extreme heat, and coil the hose without sharp bends.
Check hoses, chucks, and the inline fuse before every long trip. Replace worn valve cores annually, or sooner if leaking.
Simple maintenance routine
- Run a short test cycle monthly to keep bearings moving.
- Wipe down connections and remove debris from the chuck.
- Keep a small parts kit with spare valve cores and fuses in the same storage bag.
Final checklist for emergencies and routine care
Emergency kit items, keep together in an easy-to-reach bag: inflator, digital gauge, plug kit, valve-core tool, flashlight, gloves.
Routine care, check tire pressures cold monthly and before long trips, record values, and address slow leaks promptly.
If you want to verify TPMS or related warnings at home, consider a basic OBD2 scanner as a home diagnostic tool to confirm sensor status and clear codes.
