
P0442 Causes: Why Your EVAP System Has a Small Leak

Quick Answer
P0442 means your vehicle’s computer detected a small leak in the evaporative emissions, or EVAP, system. Common P0442 causes include a loose or damaged gas cap, cracked vapor hoses, leaking seals, a sticking purge valve, a faulty vent valve, or problems around the charcoal canister. An OBD-II code reader confirms the stored code, but finding the actual leak may require an EVAP smoke test.
Start With These P0442 Causes
- Loose gas cap: A cap that isn’t fully seated can prevent the fuel system from sealing.
- Damaged cap seal: Cracks, hardening, or debris around the seal can allow vapor to escape.
- Leaking EVAP hose: Small splits or disconnected vapor lines can trigger a small-leak test failure.
- Purge valve problem: A valve that doesn’t seal correctly can make the system behave like it has a leak.
- Vent valve problem: A sticking or leaking vent valve can stop the system from holding pressure or vacuum.
- Canister or seal leak: Cracks and damaged seals elsewhere in the EVAP system can also set P0442.
Best First Check
- Inspect and properly tighten the gas cap, then scan the vehicle again after the EVAP monitor has had time to rerun.
If your scanner shows P0442, don’t start replacing EVAP parts at random. I’ve seen small leaks come from something as simple as a cap seal, while others needed a smoke test to expose a tiny cracked hose.
This guide explains the most likely P0442 causes, symptoms, diagnosis process, and when you should bring the vehicle to a professional.
In This Guide
What Does Code P0442 Mean?
P0442 means the engine control module detected a small leak in the evaporative emission control system. You’ll usually see it with a check engine light and few, if any, noticeable driving problems.
Definition: The EVAP system captures gasoline vapors from the fuel tank instead of letting them escape into the atmosphere. It stores those vapors and later routes them into the engine to be burned.
How does the EVAP system detect a leak?
Your vehicle periodically checks whether the EVAP system can hold the expected pressure or vacuum. The exact testing method varies by manufacturer.
If the computer sees leakage beyond its calibrated limit, it stores an EVAP diagnostic trouble code. P0442 specifically points toward a relatively small leak rather than identifying one failed part.
- Fuel tank: Holds fuel and produces gasoline vapor as temperature changes.
- Charcoal canister: Stores fuel vapor until the engine can use it.
- Purge valve: Controls vapor flow toward the intake manifold.
- Vent valve: Controls fresh airflow and helps seal the system during testing.
- Vapor lines: Connect the tank, canister, valves, and engine.
- Fuel cap or filler seal: Closes the refueling opening on vehicles using a conventional cap.
Manufacturer diagnostics show why the code alone can’t tell you which component failed. Different vehicles use different leak-detection strategies and calibration thresholds.
If your vehicle has an unusual pattern of EVAP codes, you can also use NHTSA vehicle information to check for manufacturer communications or safety information applicable to your model.
Section Takeaway: P0442 identifies a small EVAP leak condition. It doesn’t automatically mean the gas cap, purge valve, or any other single component is bad.
What Are the Most Common P0442 Causes?
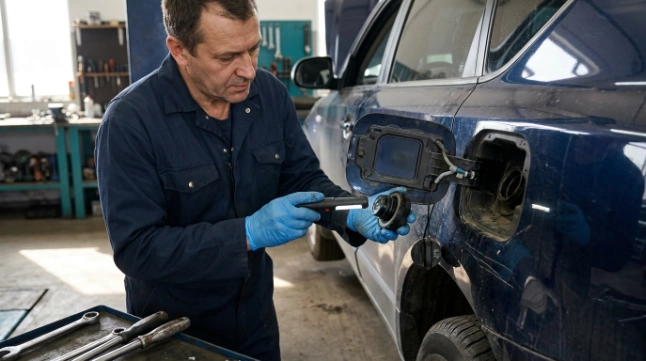
The most common P0442 causes involve a sealing problem somewhere between the fuel tank, EVAP plumbing, valves, and engine. Start with simple inspection points before replacing expensive components.
1. Loose or incorrectly installed gas cap
A loose cap is one of the easiest possibilities to check. Even something trapped beneath the sealing surface can prevent the system from closing properly.
I’ve learned not to dismiss the cap just because it looks normal from above. Remove it and inspect the seal and filler-neck contact area closely.
2. Damaged gas cap seal
The rubber sealing surface can crack, flatten, harden, or become contaminated. A cap that clicks or tightens can still leak if the sealing surface is damaged.
Don’t replace it automatically. Confirm the cap condition first because P0442 can have many other causes.
3. Cracked or disconnected EVAP vapor line
EVAP plumbing runs through areas exposed to heat, dirt, moisture, vibration, and road debris. A tiny split may be difficult to see without moving the hose.
- Look near connectors: Cracks often develop where a hose bends or attaches to a fitting.
- Check routing: A line rubbing against another component can wear through.
- Inspect connections: A partially seated quick connector can create a leak.
- Check for previous work: A line may have been left loose after fuel-system or engine repairs.
4. Purge valve that doesn’t seal
The purge valve lets stored fuel vapor enter the engine when commanded. During certain EVAP tests, however, the valve must behave exactly as the control system expects.
A purge valve that sticks open can keep the system from sealing. Manufacturer diagnostic material specifically identifies a stuck-open purge valve as a possible small-leak fault.
5. Vent valve that sticks or leaks
The canister vent valve is another common test point. Dirt contamination, sticking, damaged seals, or a valve that doesn’t close can interfere with leak testing.
This is why replacing a gas cap without testing the rest of the system sometimes changes nothing.
6. Damaged charcoal canister or EVAP housing
The charcoal canister itself can crack or become damaged. Connections around the canister can leak too.
Physical damage may happen underneath the vehicle where the canister and vapor lines can be exposed to debris.
7. Fuel tank, filler-neck, pump seal, or other EVAP seal leak
Less obvious leaks can develop around sealing surfaces connected to the fuel tank. Certain manufacturer bulletins have even identified fuel-pump seals as model-specific sources of P0442-type leaks.
That doesn’t mean your vehicle needs a fuel-pump seal. It means the entire sealed vapor system must be considered when the easy checks pass.
Technician’s note: don’t order an EVAP component only because a scanner lists it as a possible cause. Verify the leak location or valve operation first.
Section Takeaway: Start with the gas cap and visible EVAP plumbing, but remember that a sticking purge or vent valve can create the same code without an obvious cracked hose.
What Symptoms Can P0442 Cause?
P0442 often causes little more than an illuminated check engine light. EVAP leaks don’t necessarily affect how the engine runs during normal driving.
Possible signs include:
- Check engine light: This is the most common reason drivers discover P0442.
- Fuel vapor smell: A larger physical leak or damaged vapor component may allow noticeable odor.
- Hard starting after refueling: On some vehicles, an EVAP purge problem can contribute to difficult starting after filling the tank.
- Rough idle: A purge valve stuck open may affect engine operation on certain vehicles.
- Emissions inspection problem: A stored code or incomplete readiness monitor can interfere with inspection requirements where OBD testing is used.
A fuel smell deserves more attention than a check engine light alone. Avoid assuming that odor is harmless just because the car still drives normally.
For manufacturer-specific warning-light and service guidance, check your owner’s information. For example, Toyota’s owner resources provide manuals, warning-light information, recalls, and service tools for Toyota vehicles.
How Do You Diagnose a P0442 Code?
The right P0442 diagnosis moves from simple checks to targeted EVAP testing. Don’t use the trouble code as a command to replace the first component on a parts-store list.
Step 1: Scan all stored and pending codes
Connect an OBD-II scanner and record every stored, pending, and permanent code available. Related EVAP codes can change your diagnostic direction.
Save freeze-frame information when your scanner provides it. That data can show the operating conditions present when the fault was recorded.
Step 2: Inspect the fuel cap
Remove the cap and check its sealing surface. Look for cracks, distortion, contamination, damaged threads, or anything trapped beneath it.
Reinstall it correctly. On capless fuel systems, inspect the filler mechanism according to the manufacturer procedure instead.
Step 3: Inspect accessible EVAP lines and connections
Follow visible vapor plumbing where practical. Pay particular attention to connectors and areas near previous repair work.
- Look for disconnected hoses.
- Check for cracked plastic tubing.
- Inspect rubber sections for splits.
- Look for damaged connectors.
- Check for abrasion against nearby components.
- Inspect around the charcoal canister.
Step 4: Test purge and vent valve operation
A capable scan tool may allow a technician to command EVAP valves during diagnosis. Testing can determine whether a valve responds and seals as intended.
Basic code readers usually can’t perform these active tests. They mainly retrieve and clear diagnostic trouble codes.
Step 5: Perform an EVAP smoke test
Small leaks can be almost invisible during a visual inspection. A properly performed smoke test introduces diagnostic smoke into the EVAP system so leakage can be located.
Manufacturer service guidance can require specific procedures, pressures, valve commands, and test conditions. Follow the service information for your exact make, model, year, and engine.
Technician’s note: EVAP systems handle fuel vapor. If you don’t have the correct test equipment and manufacturer procedure, let a qualified repair facility perform pressure, vacuum, or smoke testing.
If you need professional diagnosis, the AAA Approved Auto Repair locator is one option for finding inspected repair facilities.
Section Takeaway: Confirm P0442 with a scanner, inspect the cap and vapor lines, test valve operation, then use a smoke test when the leak remains hidden.
Can You Drive With a P0442 Code?
A vehicle with P0442 may continue to drive normally, but you shouldn’t ignore the code. The EVAP system isn’t sealing or operating as the computer expects.
Address the issue soon, especially if you smell fuel, notice starting problems, or have additional trouble codes.
- Steady check engine light: Arrange diagnosis rather than continuing indefinitely without checking the cause.
- Strong fuel smell: Stop treating the problem as a routine code and have the vehicle inspected promptly.
- Multiple engine codes: Diagnose the complete code set because P0442 may not be your only issue.
- Flashing check engine light: A flashing light can indicate a more urgent engine problem unrelated to a simple EVAP leak.
AAA’s OBD guidance also recommends having an illuminated check engine light evaluated and treating a flashing light as an issue requiring immediate attention.
Can You Fix P0442 Yourself?
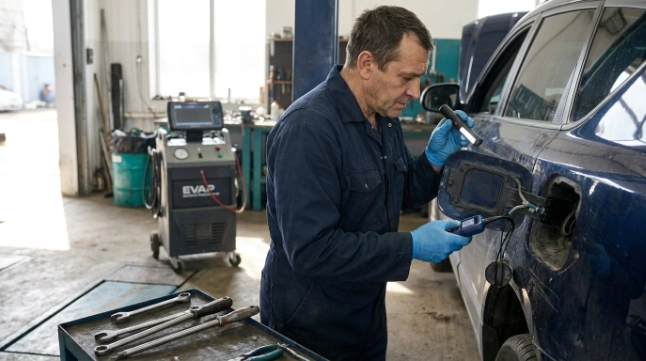
You can perform several basic P0442 checks yourself, but pinpointing a tiny leak often needs professional equipment. Your best stopping point depends on your tools and experience.
| Check | DIY Friendly? | Useful Tool | What It Can Tell You |
|---|---|---|---|
| Read P0442 | Yes | OBD-II scanner | Confirms stored and pending codes |
| Inspect fuel cap | Yes | Visual inspection | Finds obvious sealing damage or poor installation |
| Inspect accessible EVAP lines | Often | Light and safe vehicle access | May reveal cracks, rubbing, or loose connections |
| Command purge/vent valves | Advanced | Bidirectional scan tool | Helps evaluate valve response and sealing |
| Locate tiny EVAP leak | Usually professional | EVAP smoke machine | Makes hidden leakage easier to locate |
One mistake I see often is clearing P0442, replacing the gas cap, and assuming the problem is solved before the EVAP monitor reruns. The light staying off for one short drive doesn’t prove the repair worked.
The computer may need specific fuel-level, temperature, drive, and soak conditions before it can repeat its EVAP self-test. Those conditions vary by vehicle.
After any repair, check whether your readiness monitors have completed. Don’t repeatedly erase codes if you’re trying to confirm whether the vehicle has genuinely passed its self-test.
Section Takeaway: Basic inspection is DIY-friendly. Valve testing and smoke testing become much more reliable when you have the correct scan tool, service information, and EVAP equipment.
P0442 FAQ
Is P0442 usually caused by the gas cap?
A loose or damaged gas cap can cause P0442, but it isn’t the only possibility. Cracked vapor lines, purge or vent valve problems, canister damage, and other EVAP sealing faults can produce the same code.
Will tightening the gas cap clear P0442 immediately?
Not necessarily. Even after correcting the sealing problem, the vehicle may need to complete another EVAP monitor before the computer confirms that the fault is gone.
Can a purge valve cause P0442?
Yes. A purge valve that doesn’t seal correctly can interfere with EVAP leak testing. Manufacturer diagnostic guidance specifically includes a stuck-open purge valve among possible causes of a small EVAP leak code.
Can a vent valve cause P0442?
Yes. If the canister vent valve sticks open or fails to seal during the test, the EVAP system may not hold the required pressure or vacuum.
Can P0442 cause a fuel smell?
It can, although many vehicles with P0442 have no noticeable odor. If you smell gasoline or strong fuel vapor, have the vehicle inspected rather than assuming you only have a harmless check engine light.
Will P0442 affect engine performance?
Often it won’t. However, certain EVAP faults such as an improperly operating purge valve can sometimes contribute to rough idle, hard starting after refueling, or other drivability symptoms.
What is the best way to find a small EVAP leak?
After checking the gas cap and accessible hoses, an EVAP smoke test is one of the most useful ways to locate a tiny physical leak. Valve operation may also need to be tested with a capable diagnostic scan tool.
If your scanner shows P0442, begin with the simple sealing checks and resist the urge to fire the parts cannon. A careful diagnosis can separate a loose cap from a valve or hidden vapor-line leak before you spend money replacing good components.
As of 2026, the smartest approach is still the same: read the complete code set, inspect first, test second, and replace parts only after the fault is confirmed.
