
How to Fix P0456: EVAP Very Small Leak Diagnosis and Repair

Quick Answer
To fix P0456, first confirm the code with an OBD2 scanner, then inspect the fuel cap, EVAP hoses, purge valve, vent valve, and related seals. If you cannot see the leak, an EVAP smoke test is usually the most useful next step instead of replacing parts at random. You can use the AAA OBD code translator as a general code reference.
Quick P0456 Fixing Order
- Confirm P0456: Read all stored and pending codes before clearing anything.
- Check the fuel cap: Look for a loose cap, damaged seal, wrong cap, or dirty sealing surface.
- Inspect EVAP lines: Check visible vapor hoses, fittings, and connectors for cracks or damage.
- Test the valves: Check purge and vent valve operation instead of assuming either part has failed.
- Smoke-test the system: Use proper EVAP testing equipment when the very small leak is not visible.
- Verify the repair: Clear the code when appropriate and confirm the EVAP monitor completes without P0456 returning.
Most Important Tip
- Do not replace the gas cap, purge valve, or charcoal canister just because P0456 appears. Find the leak first.
P0456 can be frustrating because your car may drive perfectly while the check engine light stays on. I treat this code as a clue to a sealing problem, not an instruction to replace one specific part.
I use the same diagnostic rule I follow with electrical and immobilizer faults: confirm the problem before buying anything. This guide shows you how to fix P0456 without falling into the parts-replacement guessing game.
In This Guide
What Does P0456 Mean?
P0456 is a generic OBD-II trouble code for a very small leak detected in the evaporative emission control system. The system is normally shortened to EVAP.
The EVAP system contains gasoline vapors instead of allowing them to escape freely into the atmosphere. Your vehicle monitors this system for leaks and operating faults.
A typical EVAP system can include:
- Fuel cap or capless filler: Helps seal the fuel-filler opening.
- Charcoal canister: Temporarily stores gasoline vapor.
- Purge valve: Controls vapor flow toward the engine.
- Vent valve: Controls airflow and helps seal the system during testing.
- EVAP hoses and lines: Connect the tank, canister, valves, and engine.
- Fuel tank pressure sensor: Helps some vehicles monitor pressure or vacuum changes.
- Leak-detection hardware: Some vehicles use pumps, switches, or other equipment to perform EVAP tests.
Does P0456 tell you exactly where the leak is?
No. P0456 tells you that the vehicle detected a very small EVAP leak, but it does not identify the leaking component.
This distinction saves money. A diagnostic trouble code is evidence about a system, not proof that a particular part has failed.
How is P0456 different from other EVAP codes?
Nearby EVAP codes can provide useful context. Your scanner may show more than one code at the same time.
| Code | General Meaning | What It Suggests |
|---|---|---|
| P0440 | General EVAP system malfunction | A broad EVAP fault requiring further diagnosis |
| P0441 | Incorrect purge flow | Purge operation or vapor-flow problem |
| P0442 | Small EVAP leak detected | A sealing leak somewhere in the system |
| P0455 | Large or gross EVAP leak detected | A larger opening, disconnected line, or major sealing fault |
| P0456 | Very small EVAP leak detected | A minor leak that can be difficult to locate visually |
Manufacturer wording and diagnostic logic can differ by vehicle. Always use service information that matches your exact make, model, year, and engine.
Is P0456 Serious, and Can You Drive With It?
P0456 usually does not cause an immediate drivability problem. Many vehicles run normally because the fault involves fuel-vapor containment rather than combustion or oil pressure.
That does not mean you should ignore it. The EVAP system is part of the vehicle’s emissions controls.
When is it usually safe to keep driving?
Short-term driving is commonly possible when the check engine light is steady and the vehicle otherwise behaves normally. Arrange diagnosis rather than leaving the fault unresolved.
AAA also recommends having an illuminated check engine light evaluated, even when immediate service may not always be required.
When should you stop and investigate immediately?
Do not assume every fuel-related smell comes from a harmless vapor leak. Liquid gasoline presents a different level of risk.
- Visible fuel: Stop using the vehicle if you discover active liquid-fuel leakage.
- Strong persistent fuel odor: Have the vehicle inspected in a safe, ventilated area.
- Flashing check engine light: Treat this separately from P0456 and seek prompt service.
- Rough running or loss of power: Scan for additional codes because P0456 may not explain those symptoms.
Safety note: Never use a flame, cigarette, or improvised pressure source while searching for an EVAP leak.
Can P0456 cause an emissions-test failure?
It can. An active check engine light or incomplete emissions readiness monitors can affect inspection results where OBD-based emissions testing applies.
Clearing the code immediately before an inspection is not a proper fix. Clearing codes can reset readiness monitors, which then need time and suitable driving conditions to run again.
What Causes a P0456 Code?
P0456 can result from any fault that lets a small amount of air or vapor pass where the EVAP system expects a seal. Some causes are cheap and simple, while others require dedicated testing.
I start with parts that can be checked without disassembly. That keeps diagnosis fast and avoids turning a small problem into an expensive guessing session.
1. Loose or poorly seated fuel cap
A loose cap can prevent the EVAP system from sealing correctly. Remove it, inspect it, and reinstall it according to the vehicle’s instructions.
Do not keep tightening a damaged cap harder. Tightness cannot repair a deteriorated seal.
2. Damaged fuel-cap seal
The rubber seal can flatten, split, harden, or become contaminated. Dirt around the filler-neck sealing surface can also interfere with sealing.
- Check the rubber seal for cracks or distortion.
- Inspect the cap body for damage.
- Clean loose debris from the sealing surface.
- Verify that the cap is correct for the vehicle.
3. Cracked EVAP hose or vapor line
Heat, vibration, age, road debris, and previous repair work can damage vapor lines. A tiny crack may be almost impossible to spot without testing.
I pay close attention to bends, connectors, clips, and areas where a hose rubs another component. Those locations often deserve a closer look.
4. Purge valve that does not seal correctly
The purge valve controls stored fuel vapor entering the engine. If it leaks when it should be closed, the vehicle may struggle to perform its EVAP self-test correctly.
Some purge problems also produce starting or idle symptoms. Test the valve before ordering a replacement.
5. Vent valve or vent seal problem
The EVAP vent system must operate correctly for leak testing to work. A leaking valve, damaged seal, blocked vent, or connector problem can trigger EVAP faults.
Some vent components sit beneath the vehicle near the charcoal canister. Dirt, water, and road exposure can make that area worth inspecting.
6. Charcoal canister damage
The charcoal canister stores gasoline vapor. Cracks, damaged fittings, or other physical failures can allow small leaks.
Do not replace a canister just because P0456 appears. It is usually too expensive to use as a diagnostic experiment.
7. Leak-detection or pressure-sensing fault
Vehicle designs vary widely. Some use a leak detection pump, pressure sensor, switch, or manufacturer-specific EVAP integrity module.
A component problem can sometimes make the computer interpret system behavior as a leak. Vehicle-specific testing matters here.
Section Takeaway: P0456 has several possible causes. Start with the cap and visible lines, but use testing before replacing valves, sensors, or the charcoal canister.
How Do You Diagnose P0456 Before Replacing Parts?
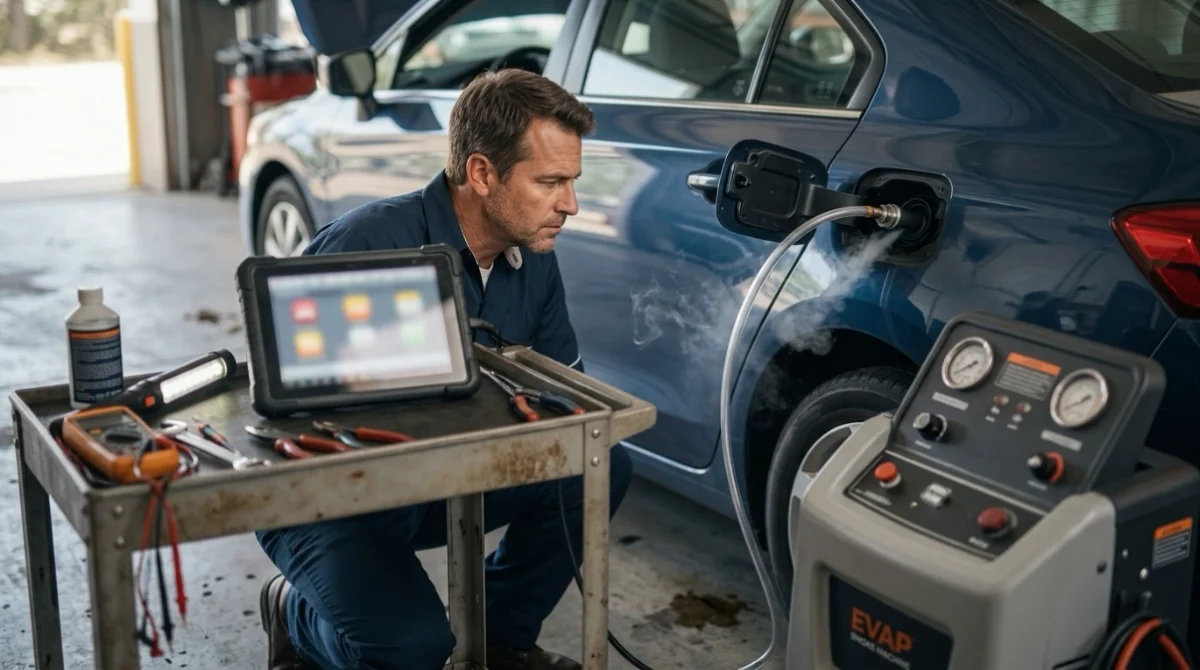
The best P0456 diagnosis moves from scanner data to simple inspection and then to leak testing. Very small leaks often cannot be found by eyesight alone.
Step 1: Scan the vehicle before clearing anything
Connect a compatible OBD2 scanner and record every stored, pending, and permanent code available. Save freeze-frame information when your scanner supports it.
- P0456
- Other EVAP codes
- Purge or vent circuit codes
- Fuel-system codes
- Freeze-frame conditions
- Readiness-monitor status
Multiple codes can change the direction of your diagnosis. Clearing everything first removes useful evidence.
Step 2: Inspect the fuel cap and filler area
Check whether the cap was left loose after refueling. Then inspect the cap, seal, threads or locking tabs, and filler-neck sealing surface.
Vehicles with capless filler systems require different inspection methods. Follow vehicle-specific information instead of applying ordinary cap advice.
Step 3: Inspect visible EVAP components
Follow accessible EVAP hoses and connections. Look for physical evidence before reaching for replacement parts.
- Cracked rubber connections
- Split plastic vapor lines
- Disconnected fittings
- Broken retaining clips
- Damaged electrical connectors
- Corroded terminals
- Road-impact damage near the canister
Step 4: Check purge and vent operation
A scan tool with bidirectional controls may let a technician command certain EVAP components. Basic OBD2 readers may only display codes and limited data.
Electrical checks can also require a multimeter and a wiring diagram. Never assume a valve is bad just because the system cannot hold pressure or vacuum.
Step 5: Perform an EVAP smoke test
A smoke test is often the turning point when P0456 survives the easy checks. Proper equipment introduces diagnostic vapor under controlled conditions so a leak can be located.
A professional test can expose leaks at seals, fittings, valves, hoses, canisters, and tank-area connections. Tiny leaks are exactly where smoke testing becomes valuable.
Pro tip: Fuel-vapor systems need controlled testing procedures. Do not substitute shop air or a homemade high-pressure setup for approved EVAP equipment.
Step 6: Check for vehicle-specific information
Some P0456 problems are associated with particular designs, seals, software strategies, or components. Before condemning an expensive part, check manufacturer information for your exact vehicle.
You can also search your vehicle through the NHTSA recall and vehicle-information database for applicable safety recalls and manufacturer communications.
Step 7: Verify the repair
After repairing the confirmed fault, clear the code when appropriate. Then allow the vehicle’s EVAP monitor to run again.
Do not call the repair successful only because the light disappears. Rescan and make sure P0456 does not return.
Section Takeaway: Record the evidence first, inspect simple items next, and smoke-test stubborn leaks. That sequence is usually more efficient than replacing EVAP parts one by one.
How Do You Fix P0456 Step by Step?
The correct P0456 fix is the repair that stops the confirmed EVAP leak or corrects the failed component. There is no universal P0456 replacement part.
1. Correct a loose fuel cap
If inspection shows the cap was simply loose, reinstall it correctly. Check the owner’s manual if you are unsure how the vehicle indicates proper closure.
Do not immediately clear everything and assume victory. The EVAP monitor may need several suitable operating conditions before it confirms the system is sealed.
2. Replace a damaged or incorrect cap
Replace the cap when the seal, housing, locking mechanism, or fit is defective. Use a part confirmed for your exact vehicle.
An incorrect cap can create the same sealing problem you are trying to fix.
3. Repair leaking EVAP hoses or fittings
Replace cracked, split, disconnected, or leaking vapor-system components with parts suitable for fuel-vapor service. Follow the manufacturer’s routing and connection requirements.
A random length of general-purpose vacuum hose is not automatically suitable for every EVAP application.
4. Replace a failed purge valve after testing
If testing proves the purge valve leaks or fails electrically, replacement may be appropriate. Follow service information for the specific vehicle.
Diagnostic note: Do not order a purge valve from the code alone. Confirm both its mechanical sealing and electrical operation where applicable.
5. Repair the vent system
If the vent valve cannot seal or operate correctly, repair the confirmed fault. Inspect its filter, hoses, wiring, connector, and mounting seals at the same time.
A new valve will not repair a cracked line beside it.
6. Repair a canister, sensor, or leak-detection fault
Replace higher-cost EVAP components only when diagnosis points directly to them. Some vehicles require specialized scan-tool routines to verify these systems.
Pro tip: Confirm part compatibility using the VIN and current manufacturer information. EVAP layouts can change between model years and engine options.
7. Clear the code and confirm monitor completion
Once the repair is complete, clear the appropriate codes if your diagnostic procedure calls for it. Drive the vehicle normally while the monitors rerun.
EVAP tests only run when certain conditions are met. Fuel level, temperature, soak time, and driving conditions can affect when the test completes.
Section Takeaway: Fix the defect you can prove. Replacing the gas cap, purge valve, vent valve, and canister together is not diagnosis.
How Much Does It Cost to Fix P0456?
P0456 repair cost varies widely because the code describes a leak condition rather than one failed component. The final price depends on the vehicle, leak location, labor rate, and parts required.
As a 2026 planning reference, a simple cap problem can cost little or nothing. Valve or canister repairs can move the bill into the hundreds of dollars.
| Possible Finding | Typical Cost Level | Why Cost Varies |
|---|---|---|
| Loose fuel cap | Minimal | May only require correct installation |
| Replacement fuel cap | Low | OEM and aftermarket pricing differs |
| Smoke-test diagnosis | Usually around one diagnostic labor charge | Shop rates and test time vary |
| Purge valve | Low to moderate hundreds | Access, parts cost, and vehicle design differ |
| Vent valve or EVAP line | Low to moderate hundreds | Underbody access can increase labor |
| Charcoal canister or complex tank-area leak | Potentially several hundred dollars | Component price and access can be substantial |
For context, published 2026 repair estimates put a typical purge-valve replacement in roughly the low-to-mid hundreds, though individual models differ significantly. Treat any online figure as a budgeting guide rather than a quote for your car.
Cost note: Ask the shop what testing confirmed before approving an expensive EVAP component. Paying for diagnosis can be cheaper than buying one incorrect part after another.
Can you fix P0456 yourself?
Basic inspection is DIY-friendly for many owners. You can scan the code, inspect the fuel cap, and check accessible hoses without advanced equipment.
Valve testing, electrical diagnosis, and smoke testing require more knowledge and tools. Stop when the procedure goes beyond your equipment or the manufacturer’s service information.
P0456 Frequently Asked Questions
Will tightening the gas cap fix P0456?
It can if a loose cap caused the EVAP leak. Inspect the cap seal and filler surface too, because tightening a damaged or incorrect cap will not restore a proper seal.
How long does it take for P0456 to clear after tightening the gas cap?
The light may not turn off immediately because the EVAP monitor only runs under certain conditions. It can take multiple trips or drive cycles before the vehicle retests the system and confirms the leak is gone.
Can a bad purge valve cause P0456?
Yes, a purge valve that fails to seal correctly can contribute to EVAP leak-test problems on some vehicles. Test the valve before replacing it because several other faults can produce the same code.
Can a bad charcoal canister cause P0456?
Yes. A cracked canister, damaged fitting, seal problem, or related connection can leak, but P0456 alone does not prove the canister is defective.
Can I pass an emissions test with P0456?
An active P0456 code and illuminated malfunction indicator light can prevent a vehicle from passing OBD-based emissions inspection. Recently cleared readiness monitors can also cause inspection problems until the required self-tests complete.
Why does P0456 keep coming back after I replaced the gas cap?
The gas cap may not have been the leak source. Inspect the EVAP hoses, vent system, purge valve, canister connections, seals, and vehicle-specific leak-detection components before replacing more parts.
Do I need a smoke test for P0456?
Not always. Start with your scanner, fuel-cap inspection, and visible hoses, but a proper smoke test becomes especially useful when a very small leak cannot be found visually.
Final takeaway: The fastest way to fix P0456 is to diagnose the EVAP system in order. Confirm the code, inspect the simple items, test the system, repair the verified fault, and then prove the code stays gone.
If the easy checks do not reveal anything, spend your next effort on proper leak testing rather than another guessed replacement part. That approach usually saves the most time, money, and frustration.
