
OBD2 Scanner Fuse Location Guide: How to Find and Check the Right Fuse

Quick Answer
The fuse that powers an OBD2 scanner is usually found in a vehicle’s interior fuse box, but its exact location and number depend on the make, model, year, and market. Look for labels such as “DLC,” “OBD,” “Diagnostic,” “CIG,” “Cigar,” “AUX,” or “Power Outlet” on the fuse diagram, then confirm the circuit in your vehicle owner’s manual or official vehicle documentation. If your scanner has no power, check the relevant fuse and the scanner connection before replacing parts.
Where to look first
- Cabin fuse box: Check under the dashboard, below the steering wheel, or behind a side panel.
- Accessory circuit: Inspect the documented cigarette-lighter, auxiliary socket, or power-outlet fuse if the vehicle shares that circuit with the diagnostic port.
- Fuse diagram: Match the circuit name and fuse rating to your exact vehicle documentation.
- Scanner connection: Make sure the connector is fully seated and check the scanner or extension cable for damage.
- Safe replacement: If a fuse is blown, use only the specified type and amperage; never install a higher-rated fuse.
Before replacing anything
- If the scanner powers on but cannot communicate with the vehicle, the problem may involve the network, ignition state, or scanner compatibility rather than the power fuse.
- If the replacement fuse blows again, stop replacing it and have the circuit checked for an electrical fault.
When an OBD2 scanner won’t turn on or refuses to connect, checking the fuse is a sensible first step. The challenge is finding the correct circuit without relying on a fuse number that belongs to a different vehicle.
In this guide, I’ll explain where to look, which fuse labels to recognize, how to check a suspected blown fuse, and what to do if the scanner still doesn’t work. I’ll also cover the difference between a scanner with no power and one that powers up but cannot communicate.
In This Guide
What Is the OBD2 Scanner Fuse?
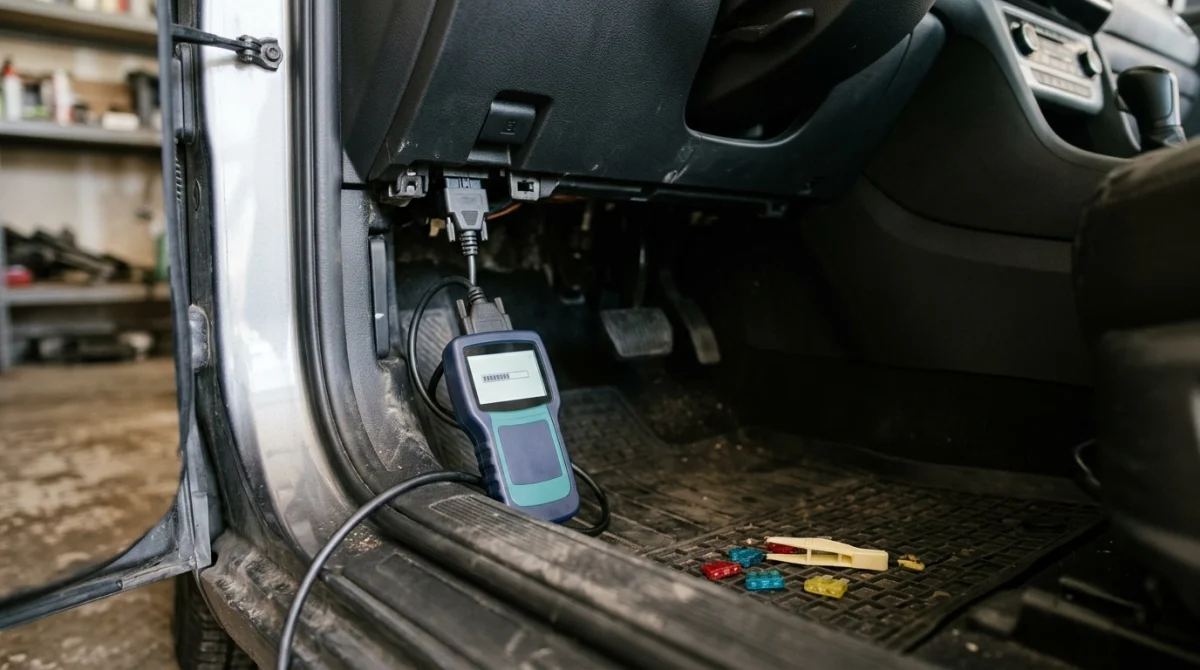
An OBD2 scanner fuse is a fuse protecting the electrical circuit that supplies power to, or supports the operation of, a vehicle’s onboard diagnostic connector. Depending on the vehicle’s electrical design, the connector may share a circuit with an accessory socket or use a separately identified diagnostic circuit.
The OBD2 connector is the diagnostic socket mechanics and vehicle owners use to connect a compatible scan tool. OBD2 means second-generation onboard diagnostics, a system that allows supported diagnostic equipment to retrieve information from a vehicle’s electronic control systems.
What does the fuse actually protect?
A fuse is designed to interrupt a circuit when excessive current flows through it. This helps protect the wiring and connected components from electrical damage.
The diagnostic connector has a power supply and ground connections, while its other terminals support vehicle communications and other functions. A blown power-supply fuse can prevent a scanner from turning on, but a communication fault can occur even when the connector receives power.
- Power supply: Provides electrical power to compatible scanners that draw power from the vehicle.
- Ground connection: Provides the electrical return path required by the circuit.
- Communication circuit: Allows supported diagnostic equipment to exchange data with vehicle systems.
These functions are related, but they are not interchangeable. A scanner that lights up has power; that alone doesn’t prove it can communicate with the engine computer.
Does every vehicle have a dedicated OBD2 fuse?
No. Some vehicles protect the diagnostic connector through a dedicated fuse, while others may use a shared circuit. The design varies by manufacturer, model, production year, and market.
That’s why a generic online fuse chart can be misleading. Use the fuse assignment documented for your exact vehicle rather than assuming that a particular number or amperage applies universally.
Section takeaway: The OBD2 fuse protects an electrical circuit, but the circuit may also supply other equipment. Identify the correct assignment before removing or replacing a fuse.
Where Is the OBD2 Scanner Fuse Located?
The OBD2 scanner fuse is often in the interior fuse panel, but some vehicles place relevant circuits in another fuse box. The owner’s manual and the fuse-box diagram are the most reliable starting points.
1. Check the interior fuse box
Start with the fuse panel inside the passenger compartment. Depending on the vehicle, it may be located in one of these areas:
- Below the steering wheel or lower dashboard.
- Behind a removable dashboard side cover.
- Near the driver’s footwell.
- Behind a small panel at the end of the dashboard.
- Behind or within a lower dashboard access panel.
These are common places to inspect, not a guarantee of your vehicle’s layout. Some diagnostic connectors sit close to the interior fuse panel, but the connector’s physical location doesn’t necessarily identify its power fuse.
2. Check the under-hood fuse box
Some vehicles route relevant power circuits through the fuse box in the engine compartment. If the owner’s manual doesn’t identify the correct fuse in the cabin panel, check the other documented fuse panels.
Do not remove relays or fuses at random. Modern vehicles can have several related power-distribution circuits, and removing the wrong component can disable unrelated systems.
3. Check the fuse diagram and owner’s manual
Look for the fuse chart printed inside the fuse-box cover or included in the owner’s manual. If the cover shows only abbreviated labels, use the manual to find the full circuit description.
When checking documentation, confirm the vehicle’s exact model year and version. Fuse assignments may change between model years, engines, trim levels, and regional specifications.
Locksmith’s note: Before identifying a fuse by number, verify the vehicle’s year, make, model, and market. A diagram for a similar vehicle is not a safe substitute for the correct documentation.
How Do You Identify the Correct Fuse?
Look for the circuit name rather than expecting every fuse box to have a fuse labeled “OBD2.” Diagnostic connector power may appear under a different label, particularly when the connector shares a circuit with other accessories.
Common fuse labels to recognize
Depending on the manufacturer’s terminology, the fuse diagram may use one of these labels:
- DLC: Data Link Connector, a common technical name for the diagnostic connector.
- OBD or Diagnostic: Labels that may identify a diagnostic-related circuit.
- CIG or Cigar: A cigarette-lighter circuit that may also supply the diagnostic connector on some vehicles.
- AUX: An auxiliary circuit, which may or may not be related to the diagnostic port.
- Power Outlet: A socket circuit that may share the OBD2 power supply on certain vehicle designs.
- ACC: Accessory power, a label that requires confirmation against the vehicle’s wiring information.
These labels are clues, not universal instructions. For example, a vehicle may have several auxiliary or accessory fuses, and only its wiring information can establish which circuit feeds the diagnostic connector.
Use this comparison to narrow your search
| Fuse label | What it may indicate | What to verify |
|---|---|---|
| DLC / OBD | A diagnostic connector circuit | The exact fuse number and rating in the manual |
| CIG / Cigar | A cigarette-lighter circuit that may be shared | Whether the diagnostic port uses this circuit |
| AUX / Power Outlet | An auxiliary or socket power circuit | Whether this particular circuit supplies the OBD2 port |
| ACC | Accessory-related power | The documented connection and operating conditions |
Never choose a fuse solely because its label sounds relevant. Confirm the circuit assignment first, then check the fuse’s specified rating.
What if the fuse chart doesn’t mention OBD2?
Search the owner’s manual for “diagnostic connector,” “data link connector,” “power outlet,” and “fuse and relay.” If those terms don’t resolve the question, consult the manufacturer’s official service information or a qualified automotive technician.
Some online diagrams cover multiple trims or markets. If the fuse layout in a diagram differs from your vehicle, stop and verify the correct version before proceeding.
Section takeaway: Labels help you narrow the search, but your vehicle’s documented wiring and fuse assignment determine which fuse is correct.
How Do You Check an OBD2 Fuse Safely?
You can often identify a blown fuse through visual inspection, but a visual check isn’t conclusive for every fuse. A suitable automotive fuse tester or multimeter can provide a more reliable check when used correctly.
Step 1: Prepare the vehicle
- Park safely, apply the parking brake, and switch off the engine.
- Follow the owner’s manual instructions for accessing the fuse panel.
- Turn off the ignition and electrical accessories unless the vehicle-specific test procedure requires another state.
- Use the specified fuse diagram to identify the correct circuit.
Follow any additional battery-disconnection or electrical safety instructions in the manufacturer’s documentation. Do not probe unfamiliar terminals or remove components from a live circuit without an approved procedure.
Step 2: Inspect the fuse
If the manual permits fuse removal, use the appropriate fuse puller and inspect the fuse. A visibly broken internal metal link or a burned element can indicate that the fuse has opened.
If the element looks intact, don’t assume the fuse is good. Some failures are difficult to see, so use an appropriate tester or multimeter if you know how to perform the test safely.
Step 3: Test with suitable equipment
A fuse tester or multimeter can help confirm whether a fuse is functioning. Follow the tool’s instructions and the vehicle’s electrical test procedure, including any requirements for ignition state or circuit access.
For a more complete diagnosis, a technician may check power and ground at the diagnostic connector using the correct pinout and test method. Avoid bridging connector terminals, inserting oversized probes, or allowing test leads to short adjacent pins.
Step 4: Check for related symptoms
Observe whether the vehicle’s accessory power outlet also works, if the manual confirms that it shares the suspected circuit. A dead outlet and an unpowered scanner can point toward a shared supply problem.
If the outlet works normally, the OBD2 port could still have a separate fuse, a ground problem, a damaged terminal, or a wiring fault. One symptom alone does not establish the cause.
Safety tip: If you are unfamiliar with automotive electrical testing, have a qualified technician check the fuse and diagnostic connector. Never use a metal object to bridge fuse contacts or connector terminals.
Section takeaway: Identify the correct fuse, inspect it safely, and confirm its condition with appropriate equipment instead of relying on appearance alone.
What If the OBD2 Scanner Still Has No Power?
If the fuse appears good but your scanner remains off, check the connector, scanner, and electrical supply before assuming that another vehicle component has failed. A scanner that powers on but displays a communication error needs a different troubleshooting approach.
Check the scanner and its cable
Start with the simplest possibilities. A loose connector, damaged cable, faulty scanner, or failed extension lead can produce symptoms similar to a vehicle power problem.
- Reseat the plug: With the vehicle switched off, disconnect and reconnect the scanner according to its instructions.
- Inspect the cable: Look for cuts, bent connector parts, loose fittings, or visible damage.
- Check the scanner: If possible, test it on another compatible vehicle with a known-working diagnostic connector.
- Inspect an extension lead: If you use one, check its connections and any manufacturer-provided fuse.
Do not force a connector into place. A damaged OBD2 socket can have bent or pushed-back terminals that prevent reliable electrical contact.
Check whether the diagnostic port receives power
A technician can measure the diagnostic connector’s power supply and ground using the correct wiring information. On a standard 16-pin OBD2 connector, pin 16 is the battery-positive supply, while pins 4 and 5 are chassis and signal grounds, respectively.
The exact testing procedure should follow the vehicle manufacturer’s guidance. Avoid shorting pins or applying external power directly to the connector, as doing so can damage electronic modules.
What if the scanner powers on but says “No Communication”?
If the screen lights up but the scanner cannot communicate, the main power fuse may not be the problem. The tool may have power while a communication circuit, vehicle network, or compatibility requirement prevents it from retrieving data.
Check these possibilities:
- Ignition state: Some diagnostic functions require the ignition to be switched on, even if the engine remains off.
- Vehicle compatibility: Confirm that the scanner supports the vehicle and the diagnostic functions you want to use.
- Connector condition: Look for loose connections or visible terminal damage.
- Vehicle network: A communication fault may require diagnosis beyond the power supply.
- Battery condition: Low vehicle battery voltage can interfere with electronic operation.
If the scanner reports a communication error after these checks, consult its manual and the vehicle-specific service information. A technician may need to diagnose the network or inspect wiring before replacing parts.
Section takeaway: A scanner with no power and a scanner with no communication are two different problems. Establish which symptom you have before replacing a fuse or buying another scan tool.
How Do You Replace the Fuse Without Creating Problems?
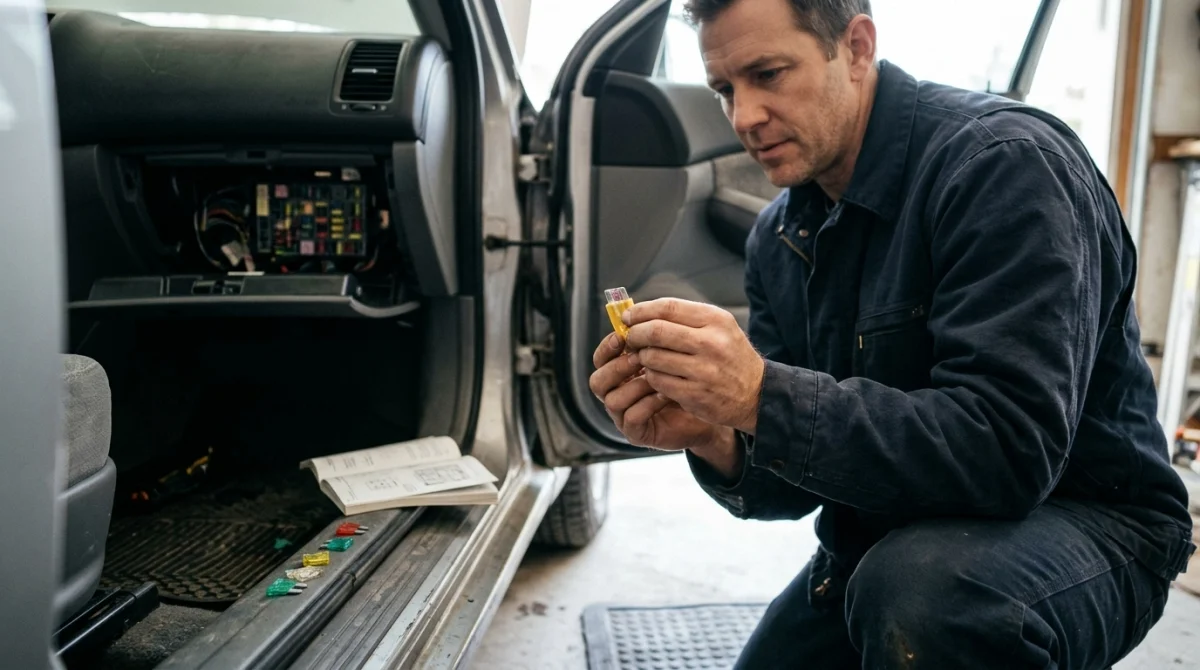
If you confirm that the correct fuse has blown, replace it only with the type and amperage specified for that circuit. The replacement must match the manufacturer’s requirements, not merely fit into the fuse slot.
Follow the vehicle’s replacement instructions
- Switch off the vehicle and follow the manufacturer’s fuse-replacement precautions.
- Use the fuse diagram to confirm the circuit and specified rating.
- Remove the failed fuse using the recommended tool, if the manual permits removal.
- Inspect the fuse slot for visible heat damage, corrosion, or other abnormalities.
- Install the correct replacement fuse as instructed by the manufacturer.
- Reconnect the scanner and check whether it powers on and communicates correctly.
These are general precautions, not a substitute for vehicle-specific instructions. Some electrical faults require professional diagnosis before replacing a fuse.
Why shouldn’t you install a higher-rated fuse?
A fuse with a higher amperage rating may allow excessive current to flow through wiring that it was not designed to protect. That can damage components and create a fire hazard.
Never bypass a fuse with wire, foil, or another improvised conductor. If the specified replacement fuse blows again, stop and have the underlying circuit inspected.
Locksmith’s note: Electrical faults around a diagnostic connector can affect more than the scanner. If you find melted plastic, burnt wiring, or repeated fuse failures, leave further troubleshooting to a qualified automotive professional.
When should you call a professional?
Seek professional help if the correct fuse is difficult to identify, the fuse fails repeatedly, or the connector shows signs of damage. A technician can use vehicle-specific wiring diagrams and diagnostic equipment to distinguish a supply fault from a wiring or communication problem.
If your vehicle has an active warning light or drivability problem, don’t assume that restoring scanner power resolves the underlying issue. The original vehicle fault may still require diagnosis and repair.
For general vehicle safety and maintenance information, you can also consult the National Highway Traffic Safety Administration and the AAA Auto Repair resource. For exact fuse assignments, prioritize the documentation for your specific vehicle.
Section takeaway: Replace a confirmed blown fuse only with the specified rating. Repeated failures or visible electrical damage call for diagnosis, not a larger fuse.
Frequently Asked Questions
Which fuse controls the OBD2 scanner?
There is no universal OBD2 fuse number. Depending on the vehicle, the diagnostic connector may use a dedicated fuse or share a circuit with a cigarette lighter, auxiliary socket, or another power supply. Check the owner’s manual for the exact year, model, and market.
Is the OBD2 fuse usually inside the car?
Often, the relevant fuse is in the interior fuse panel beneath the dashboard or behind an access cover. However, some vehicles use a circuit protected in another fuse box. Check the vehicle’s fuse diagram rather than relying on a general location.
Can a blown cigarette-lighter fuse stop an OBD2 scanner from working?
Yes, if the vehicle’s diagnostic connector shares the cigarette-lighter circuit. On other vehicles, the two circuits are separate. If both the accessory outlet and scanner stop working, check the documented circuit assignments before deciding which fuse to test.
How can I tell whether my OBD2 fuse is blown?
A broken internal metal element or a burned fuse can indicate failure, but visual inspection is not always conclusive. Use a suitable automotive fuse tester or multimeter according to the vehicle’s instructions, or ask a qualified technician to verify the fuse.
Can I use a fuse with a higher amperage rating?
No. Always use the exact fuse type and amperage specified by the vehicle manufacturer. A higher-rated fuse may fail to protect the circuit properly and can allow wiring to overheat. Never bypass a fuse or substitute an improvised conductor.
Why does my OBD2 scanner turn on but not connect?
The scanner may receive power even when communication with the vehicle fails. Possible causes include an incompatible scanner, incorrect ignition state, damaged connector terminals, a wiring fault, or a vehicle network problem. Check the tool’s instructions before investigating deeper electrical faults.
What should I do if the replacement OBD2 fuse blows again?
Stop replacing the fuse and have the circuit inspected. A repeated failure can indicate a short circuit, damaged wiring, or a faulty connected component. Installing a larger fuse or bypassing the original protection can create additional damage and safety risks.
Final Takeaway: Find the Correct OBD2 Fuse Before Replacing It
When an OBD2 scanner has no power, start with the vehicle’s fuse diagram and owner’s manual. Check the relevant diagnostic or shared accessory circuit, inspect the scanner connection, and verify the fuse safely.
Remember that fuse numbers, locations, and ratings vary by vehicle. If the scanner still fails after a confirmed fuse replacement, or the replacement blows again, have the circuit diagnosed rather than guessing at the next repair.
The most useful detail for finding the exact fuse is your vehicle’s year, make, and model. With that information, you can narrow the search to the correct fuse diagram instead of relying on a generic chart.
